
>>

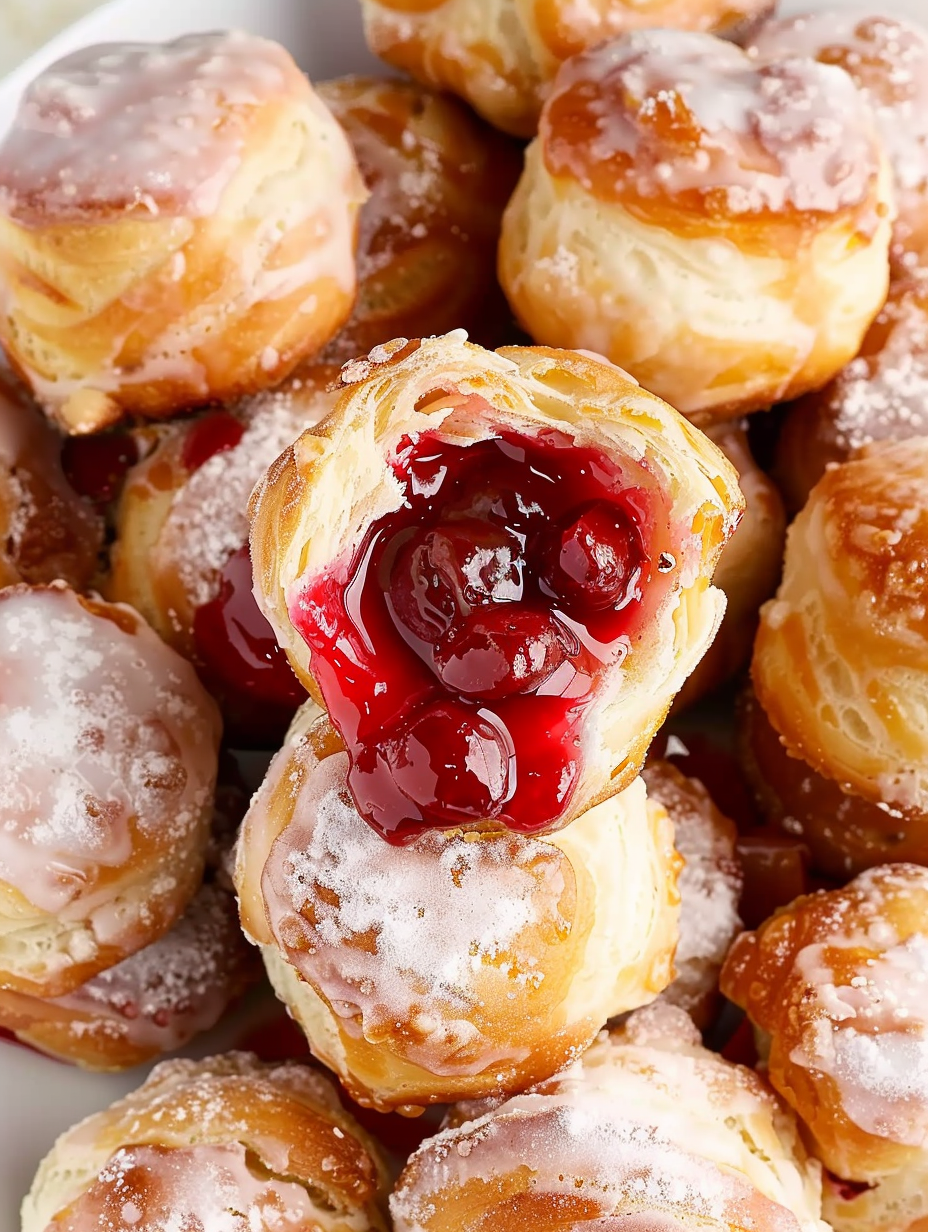
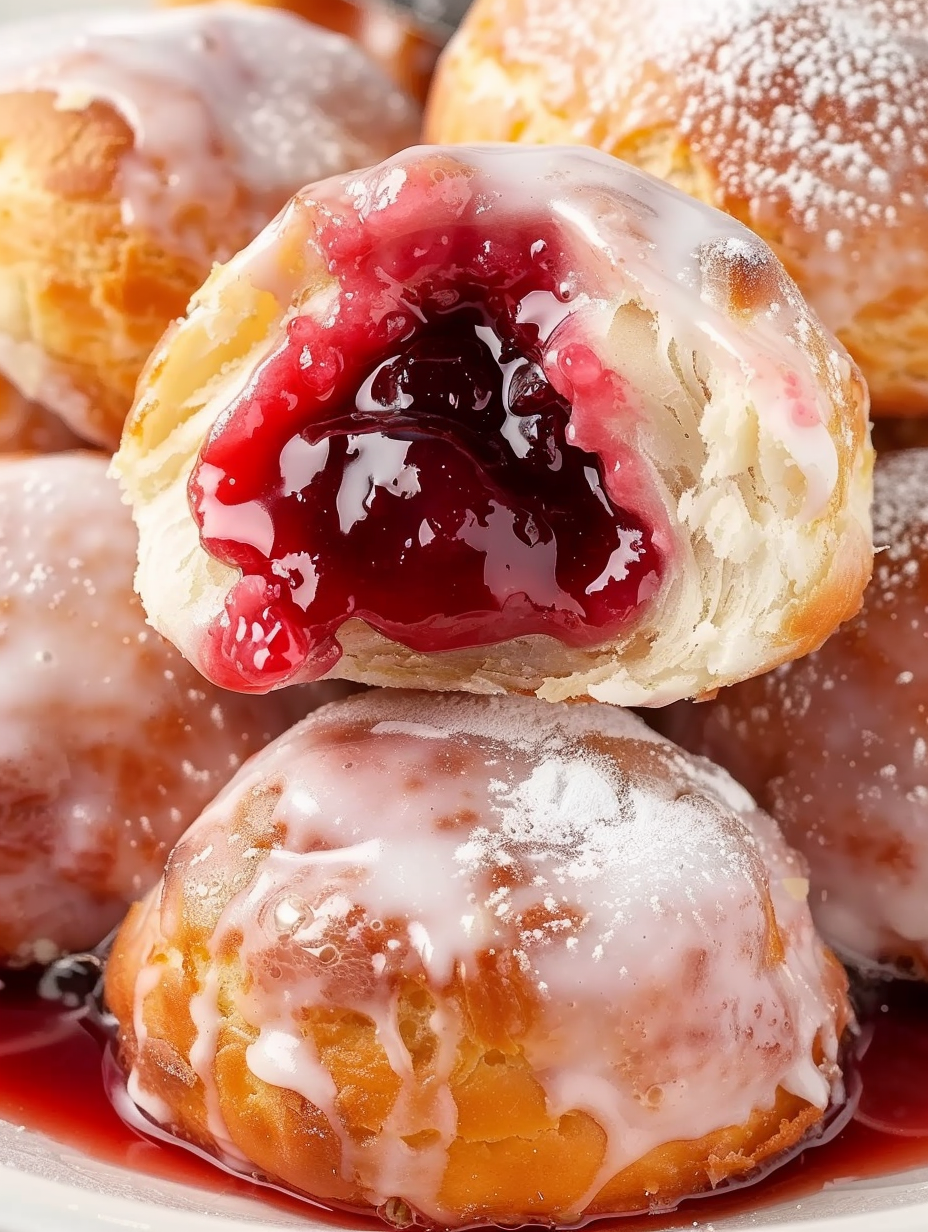
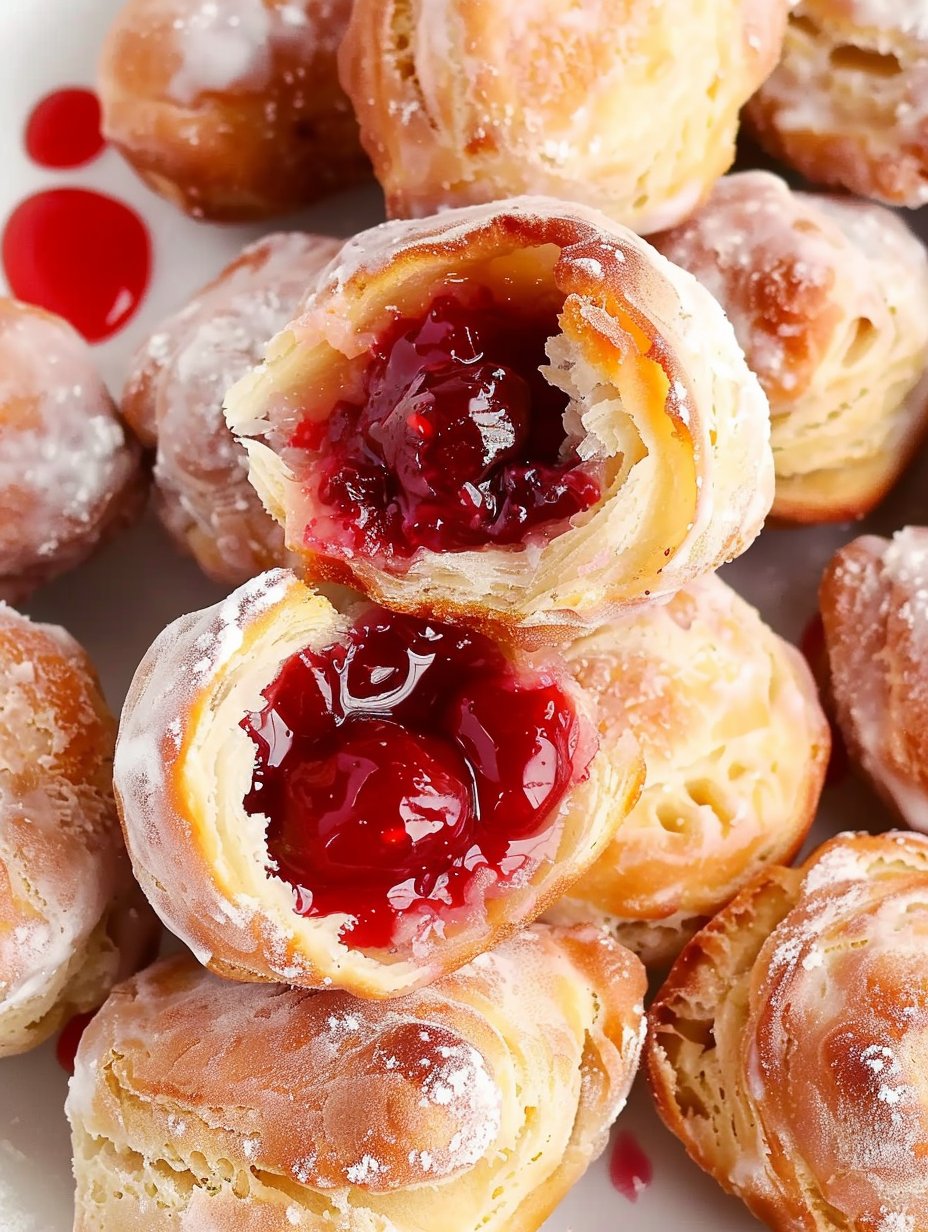
Bite sized fried pockets filled with sweet cherry pie filling and finished with a glossy sugar glaze. All the flavor of a classic cherry pie in a playful, easy to make treat.
This recipe for Cherry Pie Bombs has been one of my favorite quick desserts for years. I first put it together on a busy Saturday when I wanted the nostalgic flavor of cherry pie without the fuss of rolling crusts and watching a big pie bake. The result surprised me the way a simple combination of canned flaky biscuits and cherry pie filling can produce a crisp golden shell and a warm jammy interior that tastes like a miniature pie. They are joyful to make with kids because they are hands on, fast, and deliver big smiles at the first bite.
What makes these irresistible is the contrast of textures. The exterior becomes crisp and slightly crunchy from frying, while the inside stays soft and bursting with cherry filling. The ribbon of glossy glaze adds brightness and just enough sweetness to balance the fruit. I often bring a batch to potlucks and family gatherings because they travel well and are a crowd pleaser. The whole process from start to finish takes about 25 minutes which makes them perfect for an impromptu treat or a last minute dessert when guests arrive.
My family always reacts the same way when I bring these out warm. My niece asks for three and the adults immediately start comparing them to the local diner doughnuts. One time I made a double batch for a summer picnic and neighbors lined up to trade for other dishes. That kind of response is why these keep returning to my weekly rotation.
My favorite aspect is watching the sealed edges puff and become golden while the cherries bubble inside. One winter afternoon I made these for neighbors and we sat at the kitchen table trading stories while the warm bombs disappeared one after another. It is a simple recipe that creates memorable moments.
Keep these bite sized treats in an airtight container at room temperature for up to two days. If you plan to refrigerate they will become denser and the glaze may soften, so I do not recommend refrigeration for short term storage. For long term storage freeze unglazed bombs in a single layer on a baking sheet then place them in a freezer bag for up to three months. Fry from frozen at a slightly lower temperature and for a few extra minutes so the center heats through without burning the crust. Reheat leftover fried pieces in a 325 degree oven for a few minutes to crisp up.
If you prefer a flakier crust you can use store bought pie dough instead of biscuit dough. When using pie dough fry at 350 degrees Fahrenheit and watch carefully because cook time will be shorter. To make these dairy free swap the milk in the glaze for almond milk or oat milk and choose a biscuit dough that is labeled dairy free. For a less sweet glaze reduce powdered sugar slightly and add a splash more milk to reach desired consistency. You can also swap cherry filling for apple pie filling or blueberry preserves using the same method.
Serve warm with a dusting of extra powdered sugar or a scoop of vanilla ice cream for a decadent plated dessert. For a brunch presentation arrange them on a platter with fresh cherries and mint for color. They also pair well with strong coffee or a glass of milk. For parties place them in a basket lined with parchment and provide small tongs so guests can pick without getting sticky fingers.
Miniature fried pies have roots in many American home cooking traditions where cooks translated full sized pies into portable handheld treats. State fairs and county fairs popularized fried fruit filled pastries that could be eaten while walking. This version uses canned biscuit dough which is a modern convenience inspired by those classic fried turnovers. The use of cherry filling recalls the long American love of cherry pie as a symbol of home style baking.
In summer swap the canned cherry filling for fresh cooked cherries with a touch of sugar and cornstarch to thicken. In autumn try apple pie filling spiced with cinnamon and nutmeg. For holiday gatherings use cranberry orange filling with a splash of orange zest in the glaze. Small adjustments to filling flavors allow this method to work year round.
Assemble the filled balls ahead of time and freeze them on a tray in a single layer. Once frozen transfer to a freezer bag and fry directly from frozen. This makes it easy to serve fresh tasting fried bites with minimal last minute work. Keep glaze separate until just before serving and warm it slightly if needed to thin it for tossing. Use airtight containers and parchment between layers to keep them from sticking if you refrigerate for short term storage.
I once made a tray for a school bake sale and they sold out before lunch. Neighbors often tell me they prefer these to full pies because they are less messy and easier to transport. One reader replaced the cherry with lemon curd and declared it a new favorite. Stories like that are why I love sharing this recipe it invites playful variation and always earns compliments.
Give these a try whether you want a quick weekend treat or a fuss free dessert for company. They are forgiving to make, adaptable to many fillings, and bring the flavors of a classic cherry pie into a small perfect bite.
Maintain oil temperature at 325 degrees Fahrenheit to ensure even cooking of the shell and the filling.
Freeze assembled bombs in a single layer before transferring to a bag so they do not stick together.
Use one tablespoon of filling per bomb to prevent leaking during frying.
Toss bombs in the glaze while warm for better adhesion and a glossy finish.
This nourishing cherry pie bombs recipe is sure to be a staple in your kitchen. Enjoy every moist, high protein slice — it is perfect for breakfast or as a wholesome snack any time.
This Cherry Pie Bombs recipe makes perfectly juicy, tender, and flavorful steak every time! Serve with potatoes and a side salad for an unforgettable dinner in under 30 minutes.
Fill a 2 to 3 quart heavy bottomed saucepan a little over half full with vegetable oil. Attach a deep fry thermometer and heat oil to 325 degrees Fahrenheit. Line a plate with paper towels and set out a cooling rack over a baking sheet. Have tools ready to work in batches.
Open the biscuit can and split the flaky layers. Use your fingers or a rolling pin to gently flatten each half into a circle about three inches across. Keep the dough slightly thick so it holds filling without tearing.
Place one tablespoon of cherry pie filling in the center of each dough circle. Pinch the edges tightly and roll the seam under to form a smooth ball. A tight seal prevents leakage while frying.
Lower two to three filled balls into the hot oil using a slotted spoon. Turn them often so all sides brown evenly. Fry about five minutes until golden brown. Keep the oil at 325 degrees Fahrenheit throughout.
Remove the bombs to paper towels to drain. Whisk powdered sugar with milk and corn syrup until smooth. Toss warm bombs in the glaze or spoon glaze over them. Set on parchment or a rack to allow glaze to set.
Serve warm or allow glaze to dry for about ten minutes. Enjoy within two days for best texture. To reheat, warm in a 325 degree oven for a few minutes to refresh crispness.
Last Step: Please leave a rating and comment letting us know how you liked this recipe! This helps our business to thrive and continue providing free, high-quality recipes for you.
Leave a comment & rating below or tag
@silksavor on social media!

Tender baked salmon crowned with a garlicky Parmesan herb crust, bright lemon, and buttery crunch. Simple to make, stunning to serve, and irresistibly flavorful.

Buttery graham crust, silky cheesecake, and cinnamon-kissed apples under a crunchy crumb, finished with glossy caramel. A fall crowd-pleaser you will crave.

Tender green beans in silky mushroom cream, crowned with crispy onions. A comforting holiday side made entirely from scratch that always disappears fast.
Leave a comment & rating below or tag @silksavor on social media!
Enjoyed this recipe? Share it with friends and family, and don't forget to leave a review!
This recipe looks amazing! Can't wait to try it.
Comments are stored locally in your browser. Server comments are displayed alongside your local comments.

Join to receive our email series which contains a round-up of some of our quick and easy family favorite recipes.
