
>>

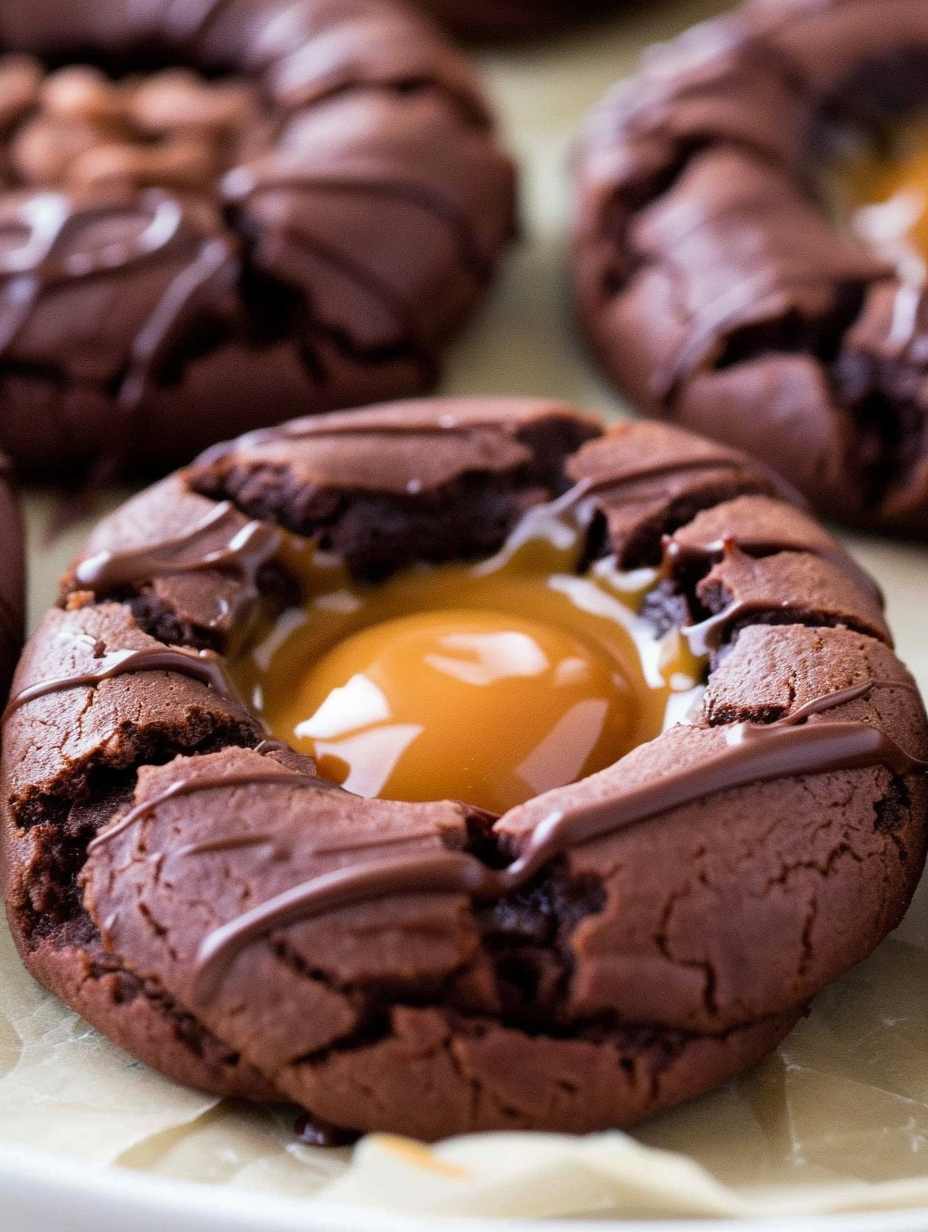
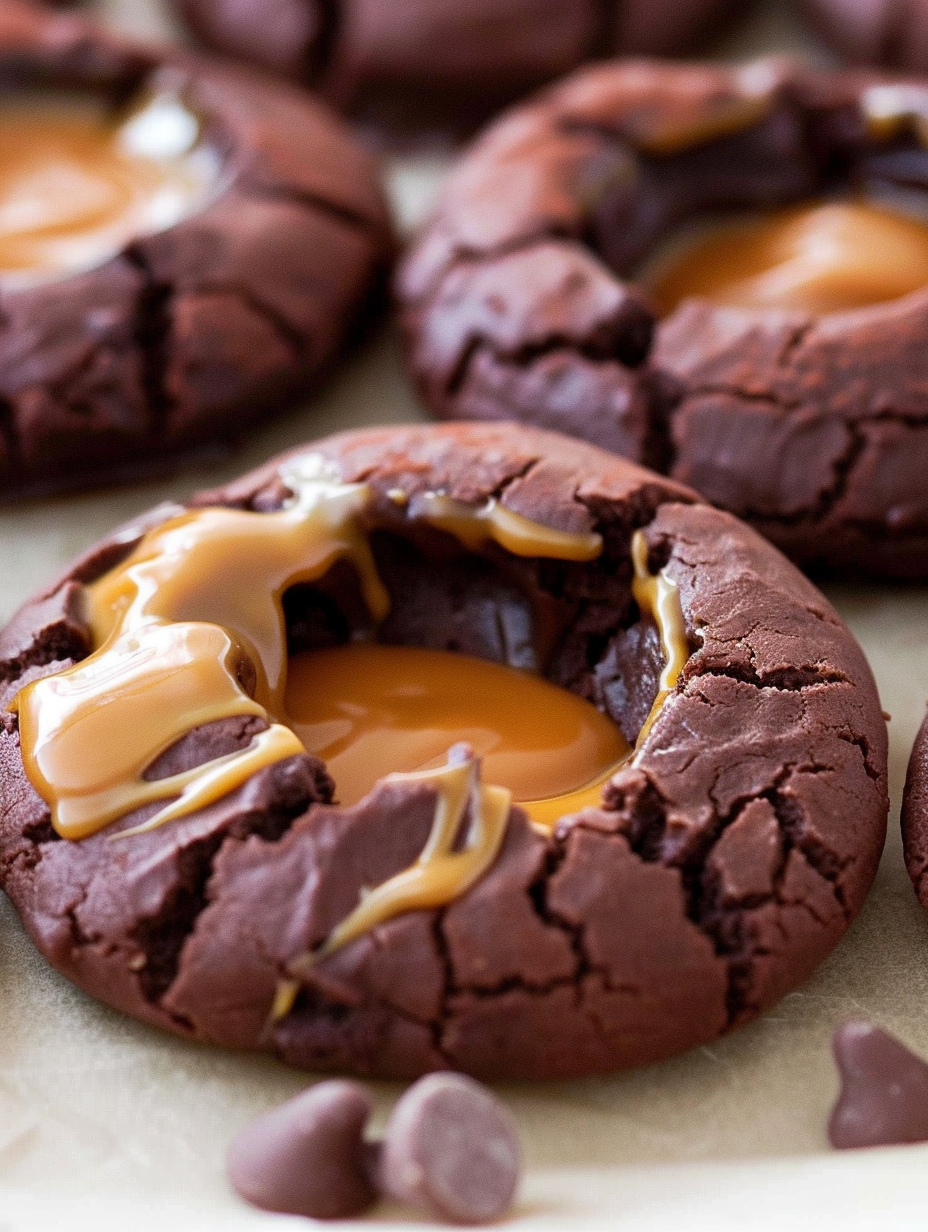
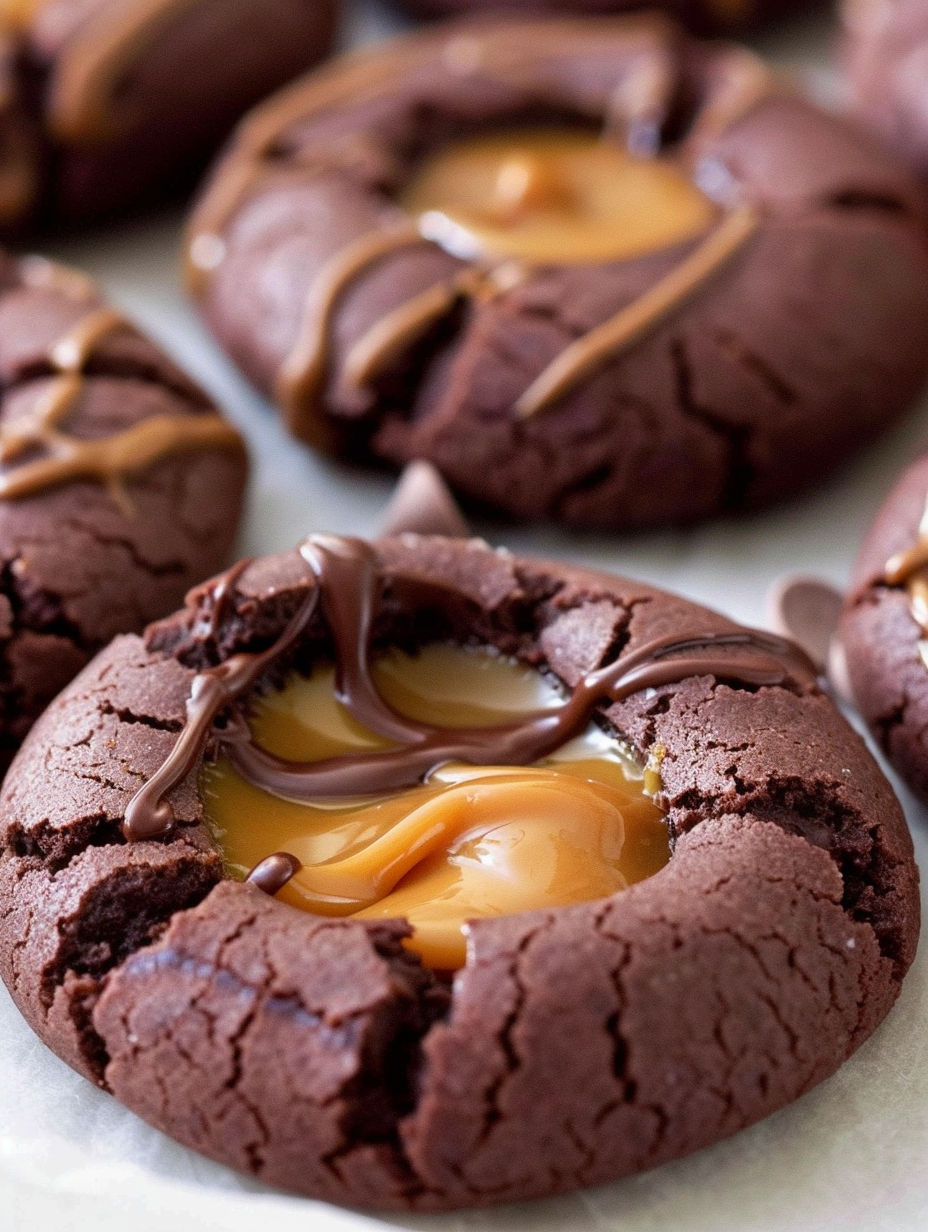
Rich chocolate shortbread-like cookies filled with silky caramel and finished with a glossy chocolate top—perfect for holiday trays or midnight baking sessions.
These Chocolate Caramel Thumbprint Cookies are my go-to when I want something that feels indulgent but comes together quickly. I first stumbled on the idea one chilly December evening when I wanted a cookie that combined my two favorite sweets: dark cocoa and buttery caramel. The first batch disappeared before the pan cooled; my family declared them a holiday must, and friends started requesting them for parties. They have that perfect contrast—cocoa-rich, tender cookie dough with a molten caramel center and a snap of chocolate on top—that keeps you reaching for another.
The texture is what makes these so special. The cookie base is tender and slightly crumbly at the edges while remaining soft around the thumbprint well, which holds the caramel. The caramel sets into a soft, chewy center once cooled, and the melted chocolate adds a glossy finish and textural contrast. I love serving these with cold milk or coffee late at night, but they also travel well for holiday cookie swaps and make a striking plate for a special dessert table.
Personally, I remember making a double batch the week before Thanksgiving when guests announced last-minute visits. I used half plain and half topped with chopped Andes mint bits—those mint ones vanished first. Watching cousins argue over the last cookie told me everything I needed to know: this combination is practically foolproof and dangerously addictive.
My favorite part is the ritual of making the wells: kids love pressing their thumbs into each ball, and you can instantly tell whose cookie is whose by the shape. At holiday gatherings, people always ask for the names of the toppings so they can recreate their favorites at home.
Store cooled cookies in a single layer or with parchment between layers inside an airtight container. At room temperature they remain soft and chewy for up to 4 days. Refrigerate to extend life to two weeks—bring to room temperature before serving for best texture. Baked cookies freeze well for up to 3 months; thaw in the fridge overnight, then bring to room temperature. For transporting, place cookies in a shallow tin with parchment to prevent sliding and topping smudges.
For a dairy-free option, substitute vegan butter and use dairy-free caramel alternatives or homemade coconut caramel; replace heavy cream with full-fat coconut milk. For gluten-free, swap all-purpose flour for a 1-to-1 gluten-free blend (check xanthan gum presence). To intensify chocolate notes, add an extra 1/4 tsp espresso powder or use dark chocolate chips for topping. Note that these swaps change texture slightly—dairy-free caramels can be softer and may require a short chill to set.
Serve warm with a glass of cold milk or a shot of espresso for an adult pairing. For a holiday platter, alternate plain chocolate-caramel thumbprints with mint-bit topped ones and sprinkle some toffee bits or chopped pecans on a few for variety. They also pair well with vanilla ice cream—place a cookie alongside a small scoop for a delightful bite where hot meets cold.
Thumbprint-style cookies have roots in European baking traditions where small wells in cookies were filled with jam or preserves. This chocolate-caramel variation modernizes that concept by replacing fruit with a candy center, reflecting a contemporary American love for hybrid desserts—bridging classic cookie technique with confectionery fillings.
For winter holidays, use chopped peppermint candies or Andes bits on handfuls of cookies. In autumn, add a pinch of cinnamon and top some cookies with toasted pecans. For summer, use salted caramel and a sprinkle of flaky sea salt on a few cookies for a balancing savory touch that complements iced coffee.
Make the dough ahead: chill it wrapped for up to 48 hours or freeze shaped balls for up to 1 month. Bake straight from frozen—add 1–2 minutes to the baking time. Prepare the caramel filling and melted chocolate in separate containers and top just before serving to avoid sticky stacking. For large batches, keep plain baked cookies in one container and top portions just before gifting to prevent toppings from shifting.
These cookies are a true keeper—easy to make, endlessly adaptable, and always a crowd-pleaser. Whether you’re assembling a last-minute plate for guests or indulging in a quiet midnight snack, these chocolate caramel thumbprints never disappoint. Enjoy and make them your own by experimenting with different toppings and chocolate blends.
Chill the dough for 10–15 minutes if it feels too soft to shape; warm butter makes the dough sticky.
Press the thumbprint gently to avoid cracking the entire cookie—edges should crack slightly for a rustic look.
Use room-temperature egg and butter for even mixing and consistent texture.
If caramel is too thick after melting, add an extra teaspoon of cream to loosen it.
This nourishing chocolate caramel thumbprint cookies recipe is sure to be a staple in your kitchen. Enjoy every moist, high protein slice — it is perfect for breakfast or as a wholesome snack any time.
Yes, you can freeze baked cookies for up to 3 months. Thaw overnight in the refrigerator before bringing to room temperature.
Use a microwave-safe bowl and heat in 30-second bursts, stirring between each, until smooth. Or melt over a double boiler to avoid scorching.
This Chocolate Caramel Thumbprint Cookies recipe makes perfectly juicy, tender, and flavorful steak every time! Serve with potatoes and a side salad for an unforgettable dinner in under 30 minutes.
Preheat oven to 350°F and line a baking sheet with parchment paper to prevent sticking and ensure even baking.
Beat 1/2 cup softened butter and 1 cup sugar until light and fluffy. Add 1 egg and 1 1/2 tsp vanilla and mix until combined.
Sift together 1 1/4 cups flour, 1/2 cup cocoa, 1/4 tsp espresso, 1/4 tsp baking soda, 1/4 tsp baking powder, and 1/2 tsp salt. Slowly add to wet mixture and blend until incorporated.
Stir in 1 Tbsp milk. Roll dough into 1–2 Tbsp balls, place on sheet, and press a thumbprint into each center.
Bake for 10–11 minutes until edges are set but centers remain soft. Cool on the sheet 2–3 minutes before filling.
Melt 15 caramels with 2 1/2 Tbsp heavy cream in 30-second intervals, stirring until smooth. Spoon into cookie wells.
Melt 1/2 cup chocolate chips and spoon or drizzle over caramel centers. Add toppings while chocolate is soft.
Allow chocolate to set 30–60 minutes at room temperature or refrigerate 10–15 minutes. Store in an airtight container.
Last Step: Please leave a rating and comment letting us know how you liked this recipe! This helps our business to thrive and continue providing free, high-quality recipes for you.
Leave a comment & rating below or tag
@silksavor on social media!

Tender baked salmon crowned with a garlicky Parmesan herb crust, bright lemon, and buttery crunch. Simple to make, stunning to serve, and irresistibly flavorful.

Buttery graham crust, silky cheesecake, and cinnamon-kissed apples under a crunchy crumb, finished with glossy caramel. A fall crowd-pleaser you will crave.

Tender green beans in silky mushroom cream, crowned with crispy onions. A comforting holiday side made entirely from scratch that always disappears fast.
Leave a comment & rating below or tag @silksavor on social media!
Enjoyed this recipe? Share it with friends and family, and don't forget to leave a review!
This recipe looks amazing! Can't wait to try it.
Comments are stored locally in your browser. Server comments are displayed alongside your local comments.

Join to receive our email series which contains a round-up of some of our quick and easy family favorite recipes.
