
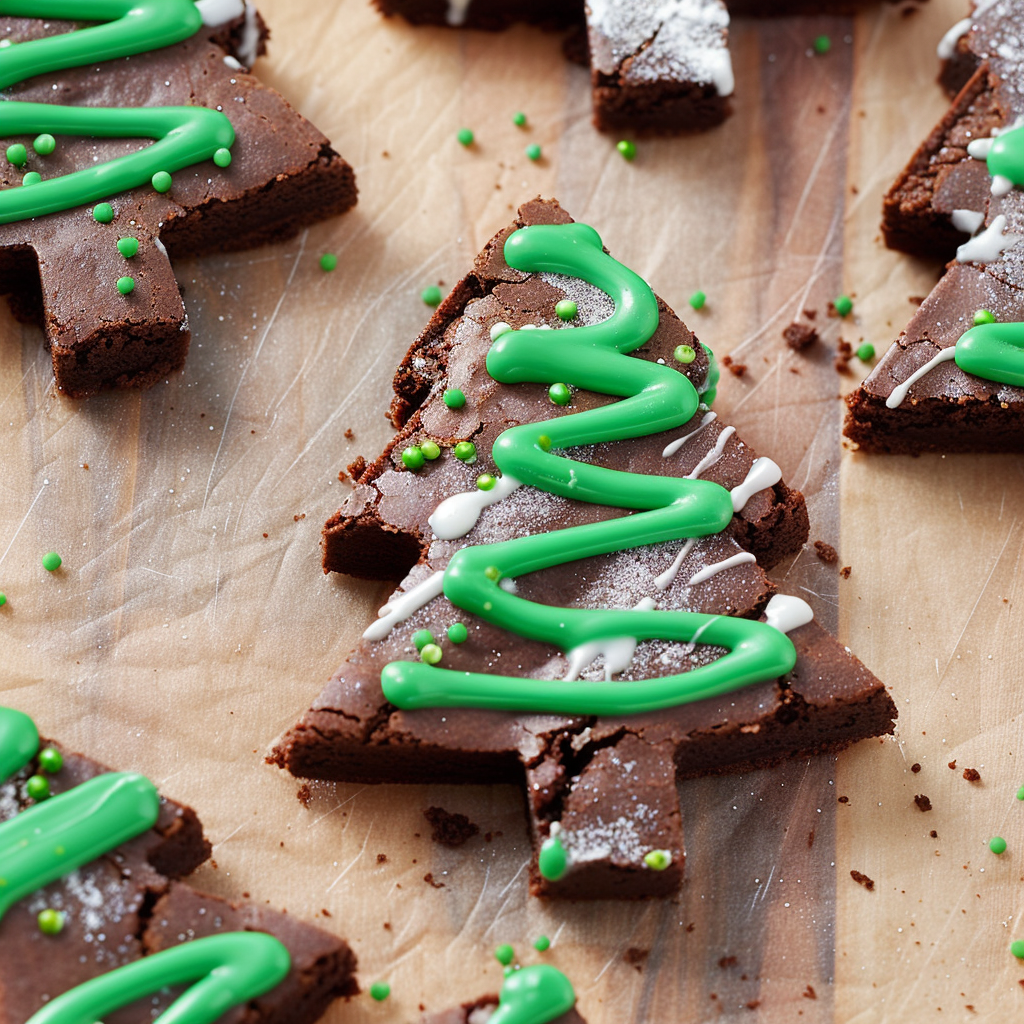
Christmas Tree Brownies

Fun to decorate with kids and perfect for holiday parties: fudgy brownies cut into tree shapes and piped with green and white icing for festive cheer.
This recipe for Christmas Tree Brownies became a holiday tradition in my house the first year I needed an activity that combined baking and crafting with my kids. I discovered this approach on a snowy afternoon when the children wanted to help but their attention span was short. The solution was to make a forgiving, fudgy brownie that could be cooled, cut into shapes, and decorated like a cookie. The entire process turned baking into a collaborative, creative ritual. The result is a dense chocolate base with a tender crumb that holds up to cutting and piping, and a sweet, simple icing that sets quickly so little hands can add sprinkles without a mess.
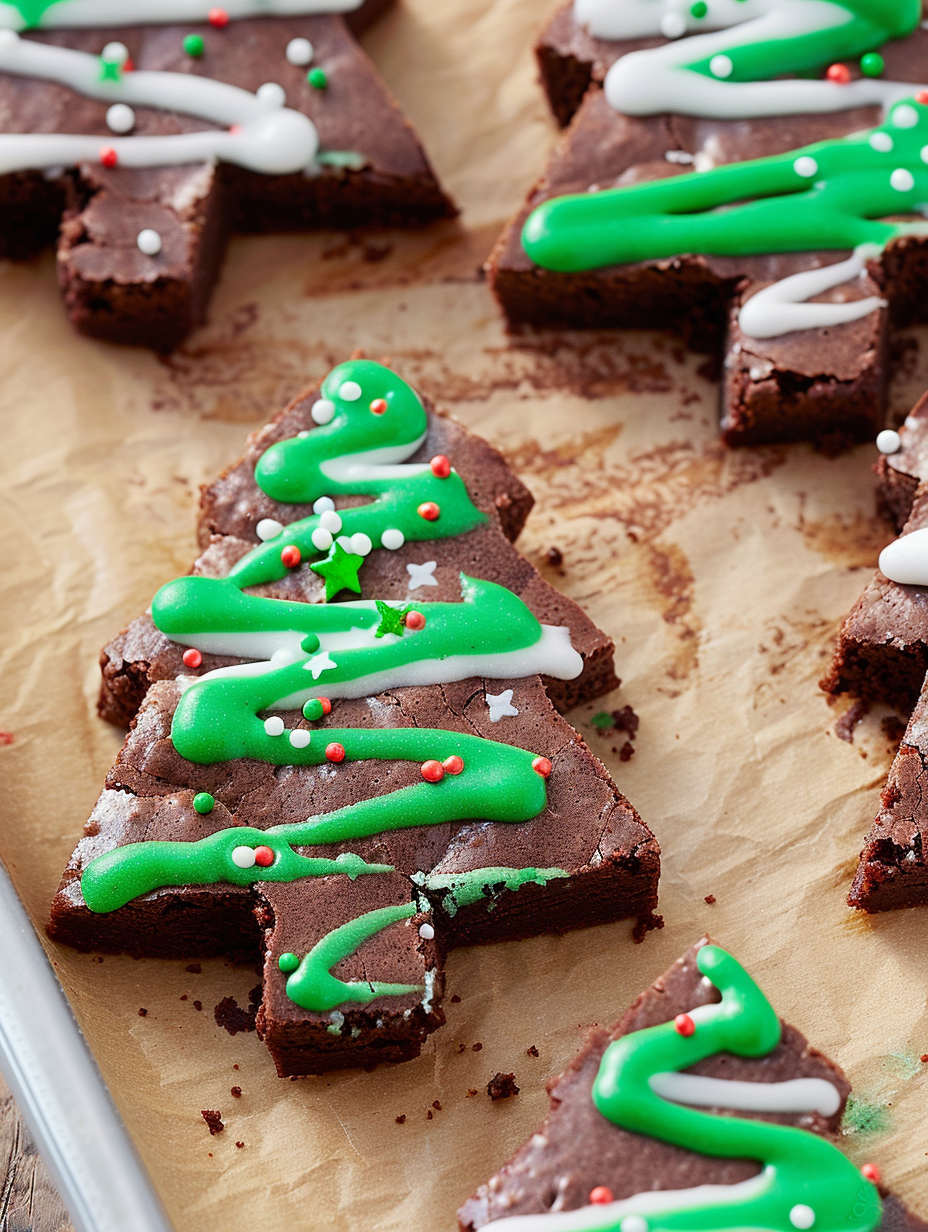
What makes these treats special is the combination of textures and the communal experience. The brownies are rich and chocolate-forward with a slightly crisp top and a moist center. The icing is thin enough to pipe into clean zigzag lines but thick enough to hold sprinkles. We usually make a batch in the morning, let the brownies chill, and spend the afternoon decorating while holiday music plays. Guests always comment that they taste better than they look, and my table is always brighter with a platter of green and white trees. These are perfect for school parties, cookie exchanges, or as a weekend family project that produces edible decorations and warm memories.
Why You'll Love This Recipe
- Kid friendly decorating makes this a holiday activity and a dessert in one, turning baking time into family bonding time and giving kids a safe, creative role.
- Quick to prepare: about 10 minutes of active work, 30 minutes in the oven and 10 minutes for decorating, so you can make a batch between errands or after school.
- Uses pantry staples like all purpose flour, cocoa powder and sugar so you rarely need a special grocery trip during the busy season.
- Flexible decorating: simple powdered sugar icing with adjustable thickness allows piping precision or loose spreading for little artists.
- Make-ahead friendly: baked and chilled trees store well in the refrigerator for up to three days or freeze for longer keeping.
- Crowd pleasing: fudgy texture and familiar flavors mean even picky eaters reach for seconds and the festive look makes them ideal for gatherings.
In my experience the easiest way to keep the activity fun is to let each child design their own trees with different sprinkles. One year my youngest made a set of polka dot trees that were the most popular at our holiday open house. The simplicity of the icing means the decorations look charming even when imperfect, which is part of the magic.
Ingredients
- All purpose flour: Use 3/4 cup of standard all purpose flour like King Arthur or Gold Medal. Spoon and level for accuracy. The flour gives enough structure to hold the tree shape while keeping the interior tender.
- Cocoa powder: 3/4 cup unsweetened cocoa powder. I prefer a natural unsweetened brand such as Ghirardelli or Hershey's dark cocoa for deep chocolate flavor; sift to avoid lumps.
- Kosher salt: 3/4 teaspoon. Salt enhances the chocolate notes and balances the sweetness. Use Diamond Crystal or Morton, adjusting slightly if using a different crystal size.
- Unsalted butter: 15 tablespoons, melted and slightly cooled. Real butter gives a rich mouthfeel; 15 tablespoons is just under 1 cup. Clarified or browned butter are optional variations.
- Sugar: 1 1/2 cups granulated sugar, such as Domino. This amount yields a nicely sweet base without being cloying.
- Vanilla extract: 2 teaspoons pure vanilla. Use a high quality bottle for depth of flavor.
- Eggs: 3 large eggs at room temperature. Room temperature eggs incorporate more easily and produce a smoother batter.
- Powdered sugar for icing: 1 cup sifted for a silky finish. Use Confectioners sugar for best texture.
- Milk: 1 to 2 tablespoons to adjust icing consistency. Whole milk provides the richest taste, but any milk will work.
- Green food coloring: As needed. I use a dye free liquid or natural spirulina-based green when possible to keep colors gentle for kids.
- Holiday themed sprinkles: A small jar of mixed festive sprinkles makes decorating playful. Choose shapes and colors you like.
Instructions
Preheat and prepare: Preheat the oven to 325° F. Grease a 9x13 baking pan and line with parchment so you can lift the baked slab out easily. Preheating to the proper temperature ensures the brownies develop a thin crackly top without overbaking the interior. Mix dry ingredients: In a medium bowl whisk together 3/4 cup all purpose flour, 3/4 cup cocoa powder and 3/4 teaspoon kosher salt until evenly combined. Sifting the cocoa can help prevent clumps and gives a more uniform batter. Combine wet ingredients: In a large bowl using a hand mixer or stand mixer, combine the melted butter with 1 1/2 cups sugar and 2 teaspoons vanilla. Beat briefly to blend. Add 3 large eggs one at a time, mixing after each until fully incorporated. Eggs provide richness and structure; adding them slowly gives a smoother emulsion. Fold in dry ingredients: Pour the dry mixture into the wet ingredients and mix gently on low speed until just combined. Overmixing will develop gluten and make the baked slab tougher, so stop when no streaks of flour remain. Bake: Pour the batter into your prepared 9x13 pan, smoothing the top with a spatula. Bake for about 30 minutes. A toothpick inserted near the center should come out with a few moist crumbs but not raw batter. Allow the slab to cool completely on a wire rack before cutting. Cut tree shapes: Once cooled, transfer the slab to a cutting surface and use a Christmas tree cookie cutter to press out shapes. Start at the edges and cut trees close together to maximize yield. For cleaner cuts chill the slab for 30 minutes before cutting if needed. Prepare icing: In a small bowl whisk together 1 cup powdered sugar with 1 to 2 tablespoons milk until smooth. Divide the icing and tint half with green food coloring. Transfer each icing into separate plastic ziplock bags, remove excess air, seal and push icing into one corner then snip a tiny hole to pipe. Decorate: Pipe a zigzag pattern of green and white across each tree then immediately sprinkle festive sprinkles so they adhere before the icing sets. Work in small batches for best control and to keep little decorators engaged. Serve: Arrange on a platter and serve at room temperature or slightly chilled. These hold shape best when fully set and chilled briefly after decorating.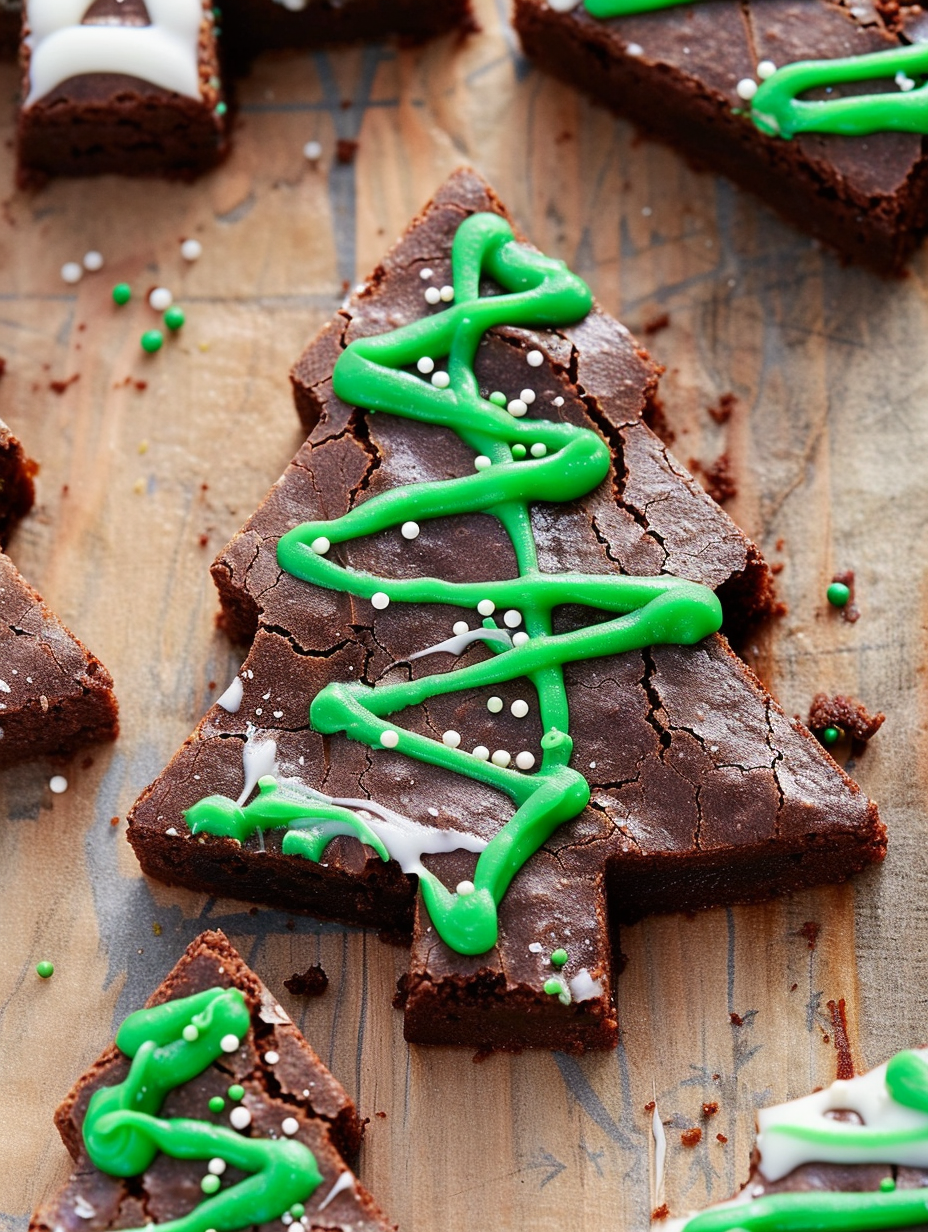
You Must Know
- These keep refrigerated for up to three days in an airtight container and freeze well for three months if wrapped individually in plastic and stored in a zip top bag.
- Chilled brownies cut cleaner and hold detailed shapes better than warm brownies, so plan to let them cool completely before cutting.
- The icing consistency is key: thicker icing holds shape but pipes less smoothly; thinner icing spreads easily but may need more time to set before stacking.
- This treat is relatively high in sugar and fat, so portion control is simple with small tree shapes—yield is about 12 medium trees from a 9x13 slab.
My favorite part is how decorating brightens the kitchen. One year a neighbor boy timidly added one sprinkle and beamed with pride. The ritual of piping and selecting sprinkles creates tiny celebrations around the table, and those memories often outshine the dessert itself.
Storage Tips
Store finished trees in a single layer in an airtight container at room temperature for a day, or refrigerate to keep the icing firm for up to three days. If stacking is necessary, separate layers with parchment paper. To freeze, flash freeze the decorated trees on a baking sheet until firm then transfer to a freezer bag. Thaw in the refrigerator overnight to reduce condensation on the icing. Reheat briefly at room temperature before serving to soften the chocolate slightly while preserving decorations.
Ingredient Substitutions
For a dairy free version, substitute melted vegan butter or coconut oil for the unsalted butter and use a plant based milk for the icing. To make gluten free, replace the all purpose flour with a one-to-one gluten free flour blend and add 1/8 teaspoon xanthan gum if your blend lacks it. If you prefer a fudgier texture, reduce the flour by one tablespoon and bake a few minutes less. For deeper chocolate flavor, swap half the cocoa for Dutch processed cocoa and increase vanilla to 1 tablespoon for added warmth.
Serving Suggestions
Present a platter of varying tree sizes with a scattering of powdered sugar 'snow' for visual charm. Pair with hot cocoa, mulled cider or a simple espresso for adult guests. For a party, set out extra bowls of sprinkles and let children decorate their own trees. Garnish with tiny edible gold flakes or a dot of white icing at the tree top to mimic a star. These also work as edible place cards tied with a ribbon to festive napkins.
Cultural Background
Decorated confections tied to winter holidays date back centuries, with gingerbread houses and iced cookies historically used as festive treats. The idea of cutting a simple baked slab into shapes and decorating it borrows from cookie traditions while simplifying preparation. Brownies themselves are an American classic dating to the early 20th century. Combining that fudgy heritage with cookie-like ornamentation feels both modern and nostalgic—a practical twist on perennial seasonal baking rituals.
Seasonal Adaptations
In winter use green and white icing and classic red and gold sprinkles. For a snowy theme, switch to white and silver with a dusting of powdered sugar. In colder climates try adding a pinch of cinnamon or orange zest to the batter for warm spicy notes. For a summer version, use star shaped cutters and bright citrus or berry glazes. The base is adaptable, so try peppermint extract in the icing for an unmistakably festive flavor.
Meal Prep Tips
Make the slab a day ahead and refrigerate overnight; cutting and decorating the next day saves time and improves shape retention. Keep icing in separate bags and pipe just before serving to avoid sogginess. If prepping for a crowd, double the batter and bake in two pans to maintain baking time and texture. Label containers with the date and use freezer-safe boxes when storing multiples for parties or gifts.
These Christmas Tree Brownies combine familiar chocolate comfort with joyful decorating. Whether you are hosting a holiday gathering or creating a quiet afternoon activity with children, these treats deliver both flavor and fun. Try making them your own this season and enjoy the cozy chaos of a kitchen full of sprinkles and laughter.
Pro Tips
Chill the baked slab for 30 minutes before cutting to get cleaner edges and reduce crumbling.
Start with a very small snip in the corner of the zip top bag and test pipe on a plate to control icing flow.
Add sprinkles immediately after piping so they stick to the wet icing, and work in small batches to prevent icing from setting too fast.
Use room temperature eggs for better emulsion and a smoother batter.
For extra shiny tops, beat the sugar and eggs longer before adding the flour to encourage a thin crackly crust.
This nourishing christmas tree brownies recipe is sure to be a staple in your kitchen. Enjoy every moist, high protein slice — it is perfect for breakfast or as a wholesome snack any time.
FAQs about Recipes
Can I freeze the decorated trees?
Yes. Bake the slab, cool completely, then wrap individual trees and freeze for up to three months. Thaw overnight in the refrigerator before serving.
How do I get clean shapes when cutting?
Chill the baked slab for 20 to 30 minutes before cutting or refrigerate overnight. Use a firm cookie cutter and press straight down without rocking.
Tags
Christmas Tree Brownies
This Christmas Tree Brownies recipe makes perfectly juicy, tender, and flavorful steak every time! Serve with potatoes and a side salad for an unforgettable dinner in under 30 minutes.
Ingredients
For the Brownies
For Decorating
Instructions
Preheat and prepare
Preheat oven to 325° F, grease a 9x13 pan and line with parchment paper for easy removal.
Mix dry ingredients
Whisk together flour, cocoa powder and kosher salt in a medium bowl and set aside to avoid lumps.
Combine wet ingredients
In a large bowl combine melted butter, sugar and vanilla, then add eggs one at a time until incorporated.
Fold and bake
Slowly add the dry ingredients to the wet and mix until just combined. Pour into prepared pan and bake about 30 minutes until set with moist crumbs.
Cool and cut shapes
Allow the slab to cool completely, then cut Christmas tree shapes with a cookie cutter. Chilling helps maintain clean edges.
Make icing and decorate
Mix powdered sugar with milk to desired consistency, tint half green, place in piping bags and create zigzag patterns, then add sprinkles.
Serve or store
Serve at room temperature or chill briefly. Store in an airtight container in the refrigerator for up to three days or freeze for longer keeping.
Last Step: Please leave a rating and comment letting us know how you liked this recipe! This helps our business to thrive and continue providing free, high-quality recipes for you.
Nutrition
Did You Make This?
Leave a comment & rating below or tag
@silksavor on social media!
Categories:
You might also like...

Parmesan Herb Crusted Salmon
Tender baked salmon crowned with a garlicky Parmesan herb crust, bright lemon, and buttery crunch. Simple to make, stunning to serve, and irresistibly flavorful.

Caramel Apple Cheesecake Bars
Buttery graham crust, silky cheesecake, and cinnamon-kissed apples under a crunchy crumb, finished with glossy caramel. A fall crowd-pleaser you will crave.

Homemade Green Bean Casserole
Tender green beans in silky mushroom cream, crowned with crispy onions. A comforting holiday side made entirely from scratch that always disappears fast.
Did You Make This?
Leave a comment & rating below or tag @silksavor on social media!
Rate This Recipe
Share This Recipe
Enjoyed this recipe? Share it with friends and family, and don't forget to leave a review!
Comments (1)
This recipe looks amazing! Can't wait to try it.
Comments are stored locally in your browser. Server comments are displayed alongside your local comments.

Hi, I'm Julia!
What's Popular

30-Minute Meals!
Join to receive our email series which contains a round-up of some of our quick and easy family favorite recipes.