
>>

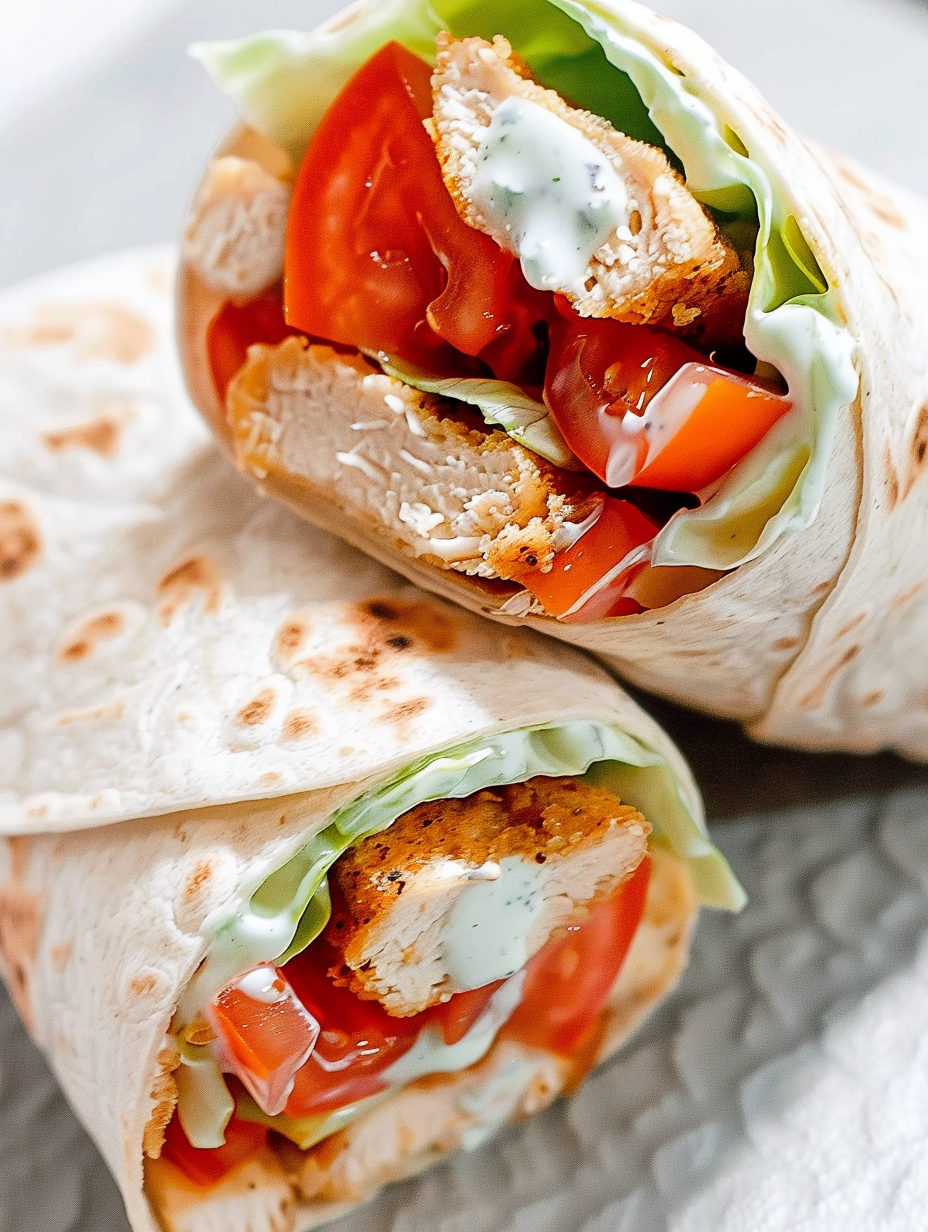
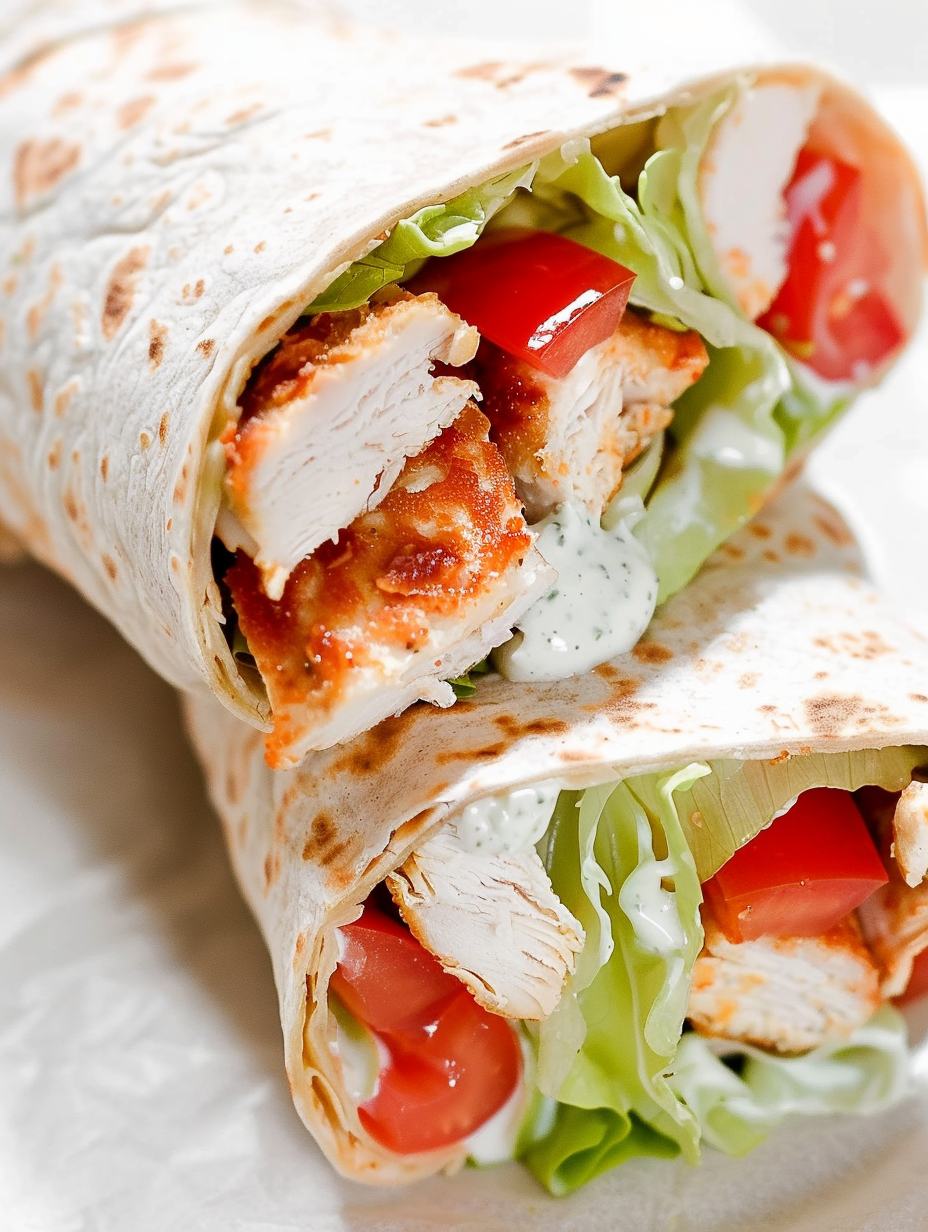
Crispy fried chicken strips tucked into warm tortillas with crisp lettuce, juicy tomato, and cool creamy ranch for an irresistible weeknight dinner.
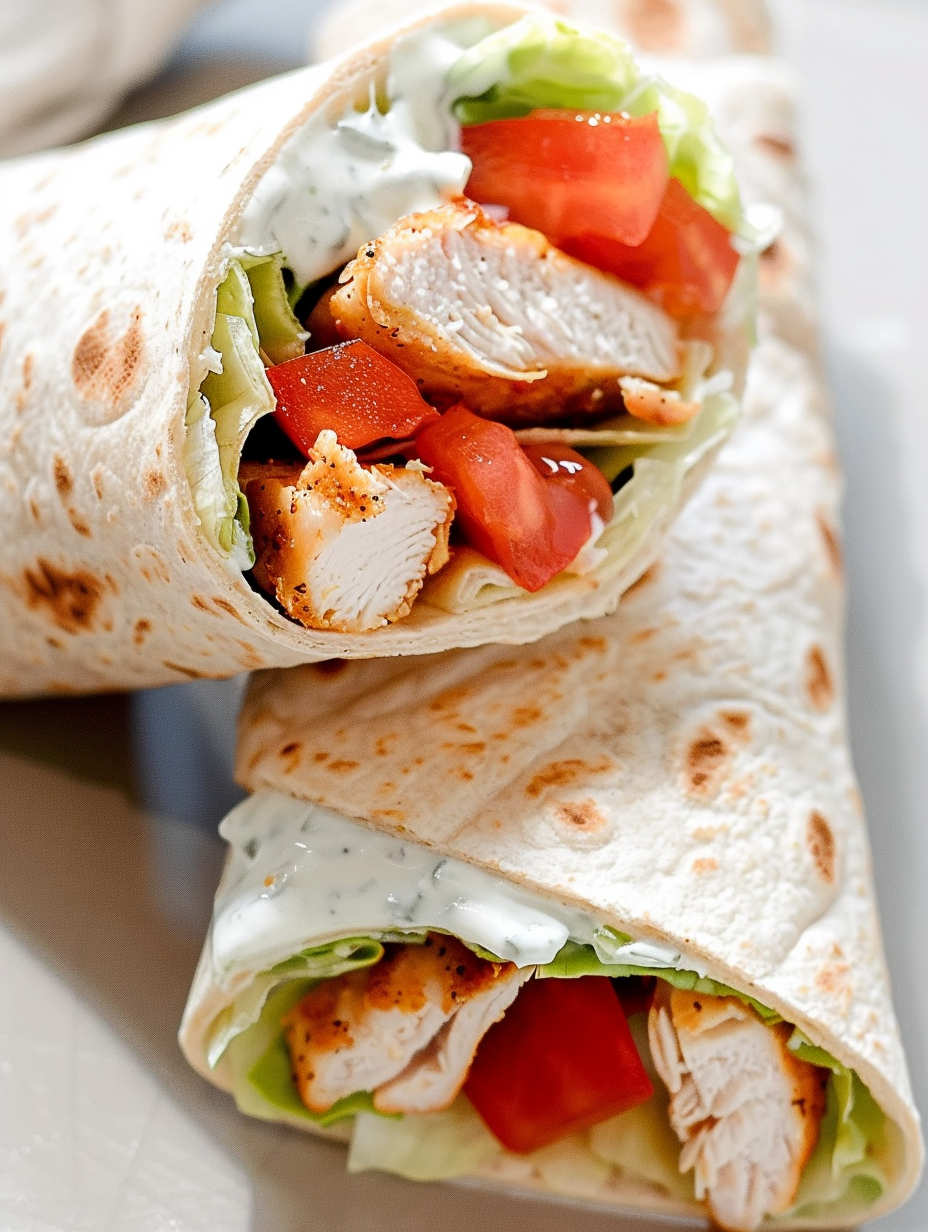
This recipe for Crispy Chicken Ranch Wraps has been a weekday lifesaver in my kitchen for years. I first developed it on a busy evening when I wanted something that felt indulgent but came together quickly. The first bite balances warm, crunchy chicken and cool, creamy ranch with the freshness of iceberg or romaine and bright, acidic tomato. It is one of those dishes that both adults and kids reach for without hesitation. The textures are the real star: a crisp golden crust that gives way to tender, juicy chicken, and the soft chew of a warmed tortilla that holds everything neatly in place.
I discovered this combination when testing fried chicken coatings and realized that a double-dredge lock produces a superior crisp without becoming heavy. The ranch dressing, whether homemade or store-bought, adds a tangy, herbaceous counterpoint that keeps the wrap from tasting greasy. I often make a double batch of chicken so there are leftovers for salads the next day. These wraps are adaptable, forgiving, and perfect for casual dinners, packed lunches, or entertaining when you want an easy hand-held option that still feels special.
Family reactions have been consistent: my teenagers give these wraps two thumbs up, and guests often ask for the recipe. I learned that the key is temperature control when frying and letting the chicken rest briefly on paper towels so it drains but does not steam. Small adjustments like slightly thinner slices or using a neutral oil with a high smoke point make a noticeable difference in texture.
What I love most about this combination is how the simple elements come together to feel like a treat without elaborate preparation. Once I started double-dredging and using a thermometer to keep oil steady, the results improved dramatically. Friends have told me these remind them of classic diner-style chicken sandwiches, but in a cleaner, more portable format.
Store leftover components separately when possible. Place fried chicken strips in an airtight container lined with paper towels to absorb residual oil and refrigerate for up to two days. Tortillas are best kept in their original packaging or wrapped in foil at room temperature for short-term use. For longer storage, freeze chicken strips on a tray until solid, then transfer to a resealable freezer bag for up to three months. To reheat, arrange frozen or refrigerated strips on a baking sheet and heat at 400 F for 6 to 10 minutes until crisp and warm. If you microwave, the crust will soften, so use the oven when texture matters.
Substitutions are straightforward. Swap all-purpose flour for a gluten-free blend 1 to 1 if needed, but expect a slightly different crust texture. Replace regular eggs with egg replacer for an egg-free bind, though coating adhesion will change. Use grilled or baked chicken when you want a lower-fat option; season and slice thinly before warming in the oven. For dairy-free versions swap ranch for a dairy-free dressing or make an avocado lime crema. If you prefer less sodium, use unsalted flour and reduce the seasoning salt to taste.
Serve the wraps with crisp sides that contrast the warm chicken. Classic pairings include kettle-style potato chips, a simple cabbage slaw, or pickled red onions for brightness. For a more substantial meal, pair with a mixed green salad tossed in lemon vinaigrette or a corn and black bean salad for a Southwestern touch. Garnish with fresh chopped parsley or chives for color and a sprinkle of cracked black pepper. These wraps also travel well in lunch boxes when wrapped tightly in foil.
These wraps take inspiration from classic American fried chicken and combine it with the tortilla wrap format common in Tex-Mex cuisine. The fusion gives a handheld meal that borrows the crunchy, seasoned crusting of Southern-style frying and pairs it with the portability of a burrito. Ranch dressing, invented in the mid-20th century in the United States, adds an herb-forward cooling element that complements spicy or fried proteins, which is why it is a natural match here.
In summer, swap Roma tomatoes for peak-season heirloom varieties and add sliced cucumbers or summer corn for sweetness. In cooler months, add roasted red peppers, a smear of chipotle mayo, or swap the lettuce for thinly sliced kale massaged with olive oil to stand up to heartier flavors. For holiday gatherings, make a platter with mini tortillas and slice strips into smaller pieces for easy serving as party finger food.
For weekly meal prep, cook a double batch of the chicken strips on Sunday and store them in single-portion containers with tortillas and sliced tomatoes separate. Store the ranch or dressing in small sealed containers and assemble each morning for lunches or quickly reheat and assemble in the evening. Use rigid plastic containers or reusable silicone bags to avoid crushing the crust. Label and date freezer packages if storing more than a day or two.
These wraps are a versatile, comforting option that rewards small investments in technique. With a few smart shortcuts and attention to frying temperature, you can make crunchy, tender chicken that elevates simple tortillas into a family favorite. Give them a try and feel free to adapt fillings to reflect your pantry and preferences.
Maintain oil temperature between 350 and 375 F to keep the coating crisp and prevent excess oil absorption.
Double-dredge the strips: flour, egg, then flour again for a sturdy, crackly crust.
Do not overcrowd the pan when frying; work in batches to keep oil temperature steady and ensure even browning.
Warm tortillas briefly before assembling to prevent tearing and make rolling easier.
If reheating, use a 400 F oven for 6 to 10 minutes to restore crispness without drying the meat.
This nourishing crispy chicken ranch wraps recipe is sure to be a staple in your kitchen. Enjoy every moist, high protein slice — it is perfect for breakfast or as a wholesome snack any time.
This Crispy Chicken Ranch Wraps recipe makes perfectly juicy, tender, and flavorful steak every time! Serve with potatoes and a side salad for an unforgettable dinner in under 30 minutes.
Pour oil into a deep skillet until it comes halfway up the sides and heat to 350 to 375 F using a thermometer. Maintaining this temperature range prevents excess oil absorption and ensures a golden crust.
Combine flour, 1 teaspoon seasoning salt, black pepper, and garlic powder in one shallow dish. Beat eggs with remaining seasoning salt in a second dish. The two-dish method helps build a stable double coating.
Slice breasts into thin strips about 1/2 inch thick. Dredge each strip in flour, dip in beaten egg, then return to flour for a second coat. Shake off excess before frying to avoid oil sputter and clumping.
Fry chicken strips 3 to 4 minutes per side until golden and internal temperature reaches 165 F. Work in batches to avoid lowering oil temperature. Drain on paper towels and lightly salt while hot.
Warm tortillas briefly so they are pliable. Place chicken strips in the center, add lettuce, tomato slices, and about 1 tablespoon ranch per wrap. Fold sides in and roll tightly from the bottom to form a snug wrap.
Slice each wrap in half on a slight diagonal and serve immediately or at room temperature. For make-ahead, wrap tightly in plastic or foil and refrigerate; reheat chicken to regain crispness if desired.
Last Step: Please leave a rating and comment letting us know how you liked this recipe! This helps our business to thrive and continue providing free, high-quality recipes for you.
Leave a comment & rating below or tag
@silksavor on social media!

Tender baked salmon crowned with a garlicky Parmesan herb crust, bright lemon, and buttery crunch. Simple to make, stunning to serve, and irresistibly flavorful.

Buttery graham crust, silky cheesecake, and cinnamon-kissed apples under a crunchy crumb, finished with glossy caramel. A fall crowd-pleaser you will crave.

Tender green beans in silky mushroom cream, crowned with crispy onions. A comforting holiday side made entirely from scratch that always disappears fast.
Leave a comment & rating below or tag @silksavor on social media!
Enjoyed this recipe? Share it with friends and family, and don't forget to leave a review!
This recipe looks amazing! Can't wait to try it.
Comments are stored locally in your browser. Server comments are displayed alongside your local comments.

Join to receive our email series which contains a round-up of some of our quick and easy family favorite recipes.
