
Crispy Jalapeño Chicken with Sweet-Spicy Glaze

Crispy, tender pieces of chicken tossed in a sticky sweet-and-spicy jalapeño glaze — a quick weeknight hit that pairs perfectly with rice or mashed potatoes.
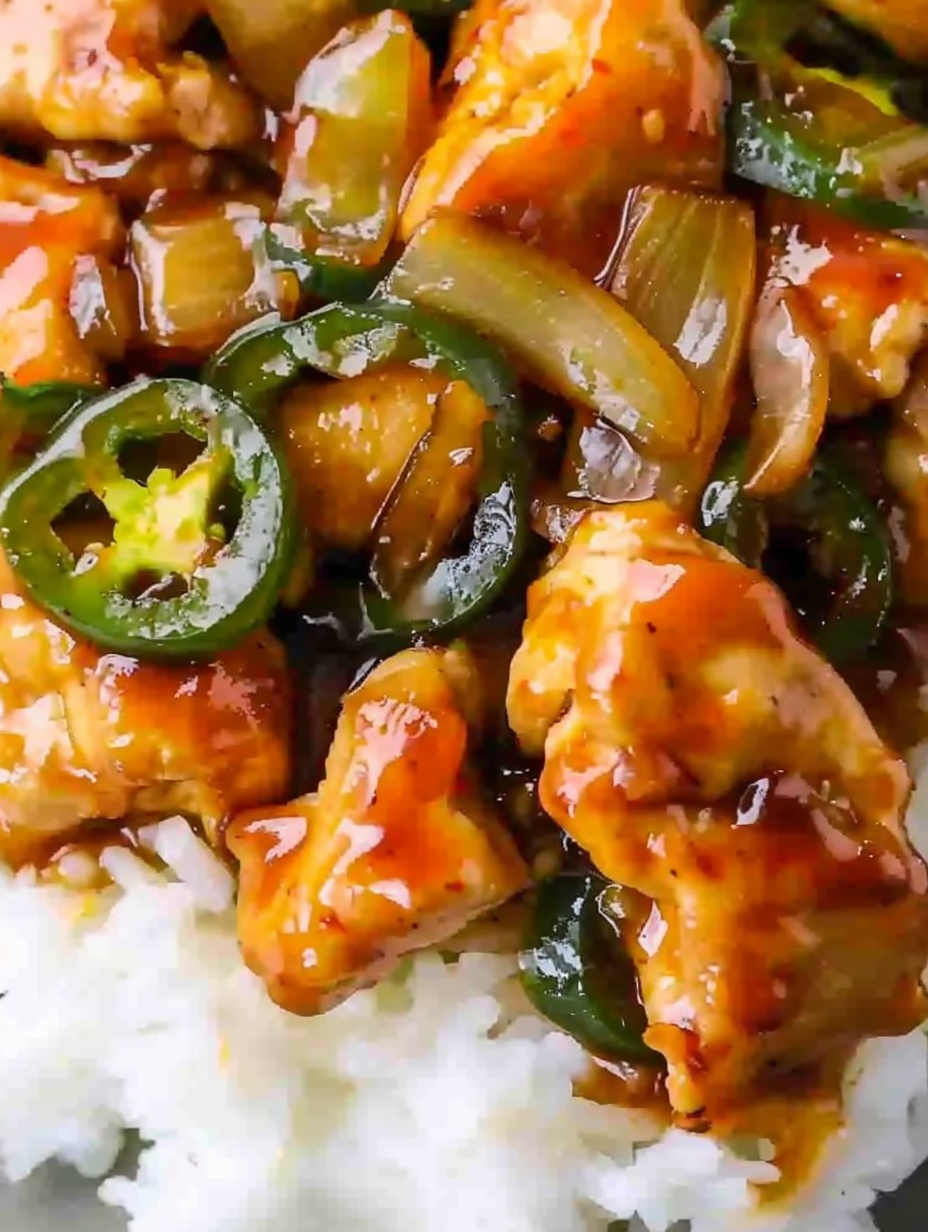
This Jalapeño Chicken delivers crispy exterior bites with tender, juicy centers, all lacquered in a bright sweet-and-spicy glaze that clings to every piece. I first made this dish on a busy weeknight when I needed something fast, bold, and pantry-friendly; the combination of cornstarch-crisped chicken and a sauce built from ketchup, soy sauce, brown sugar, and fresh jalapeños felt like a small miracle. The heat from the peppers is tempered by sugar and a touch of sesame oil, creating balance rather than burn. It became an instant favorite in my home — even less-adventurous eaters asked for seconds when the sauce caramelized and coated the chicken just right.
What I love about this preparation is its dual texture: a crunchy outer shell that softens slightly as the sauce thickens, and chicken that remains moist inside because it’s finished in the pan with the glaze rather than cooked completely during the initial sear. I discovered that searing quickly in hot oil without fully cooking yields the best result — let the sauce finish the job. Serve over steaming rice or buttery mashed potatoes to soak up the glaze; family dinners suddenly feel elevated without extra fuss.
Why You'll Love This Recipe
- Ready in about 30 minutes from start to finish — ideal for hectic weeknights when you want something bold and homemade without hours of prep.
- Uses pantry staples like cornstarch, ketchup, and brown sugar combined with fresh jalapeños for a lively flavor boost; you likely have most ingredients on hand.
- Dual-texture appeal: a crisp exterior from the cornstarch dredge and tender interiors finished in a sticky glaze that clings to each piece.
- Make-ahead friendly: the sauce can be mixed ahead and the chicken dredged and refrigerated for up to a day before cooking.
- Crowd-pleasing balance of sweet and spicy that can be adjusted easily — reduce jalapeños or add more sugar to suit picky eaters.
- Flexible sides — pairs beautifully with steamed white rice, brown rice, mashed potatoes, or even a quick noodle bowl for a complete meal.
My family’s reaction the first time I made this was immediate: plates came back clean, and someone declared it a “keeper.” I learned through repeated batches that searing fast at medium-high heat and finishing in the sauce preserves juiciness, and that lightly scoring very thick tenders helps the cornstarch adhere evenly.
Ingredients
- Chicken (1 pound): Use fresh chicken tenderloins or cut boneless chicken breasts into 1 1/2-inch strips. Tenderloins cook quickly and stay juicy; look for packages labeled "tenderloins" or thin-sliced breasts for even cooking. I often get Perdue or local butchers' tenderloins.
- Cornstarch (1/2 cup): Essential for achieving a light, crunchy coating. Arrowhead or generic cornstarch works well — shake off excess for an even crust and avoid clumping by dredging in a wide bowl.
- High-heat oil (1 cup): Use canola, vegetable, or peanut oil for deep-searing. These oils have high smoke points and produce a crisp crust without imparting extra flavors.
- Sauce components: 1/3 cup light soy sauce (Kikkoman Lite is a good choice), 1/3 cup ketchup, 1/3 cup brown sugar plus an extra 1/4 cup if you like it sweeter, 2 teaspoons vinegar (white or rice vinegar), and 4 cloves garlic minced for depth and balance.
- Aromatics: 1 small onion, chopped finely, and 3 jalapeños, seeded and sliced. Leave the seeds in if you prefer more heat. Fresh jalapeños provide a bright vegetal bite that cooked peppers mellow but still showcase.
- Finish: 2 teaspoons sesame oil to add that toasty aroma just before combining the sauce and chicken.
Instructions
Prepare the Chicken: Pat 1 pound of chicken tenderloins dry with paper towels. In a large mixing bowl, toss the strips with 1/2 cup cornstarch until evenly coated. Shake off any excess cornstarch so the coating is thin — too thick and the exterior becomes gummy. Let the coated chicken rest for 5 minutes to allow the cornstarch to adhere. Heat the Oil: Pour 1 cup of high-temperature oil into a large skillet and warm over medium-high heat until shimmering and about 350°F if you use a thermometer. You want the oil hot enough to brown quickly but not smoke. A test piece should sizzle on contact. Sear the Chicken: Working in batches if necessary, add the chicken to the hot oil and brown quickly on all sides, about 1 to 2 minutes per side. The goal is color, not full doneness — pieces will likely be golden but still slightly undercooked inside. Transfer to a plate lined with paper towels to drain. Sauté Aromatics: Discard most of the oil, leaving about 1 tablespoon in the skillet, or wipe and add 2 teaspoons sesame oil. Over medium heat, sauté the chopped onion and sliced jalapeños until they begin to soften and take on a little color, roughly 4 to 5 minutes. The sugars in the onion will help build the sauce's complexity. Build the Sauce: Add 1/3 cup light soy sauce, 1/3 cup ketchup, 1/3 cup brown sugar, 2 teaspoons vinegar, and 4 cloves minced garlic to the pan. Whisk or stir to combine and bring to a gentle simmer. Taste and adjust: add the extra 1/4 cup brown sugar if you prefer a sweeter glaze, or a dash more vinegar for brightness. Finish the Chicken: Return the partially cooked chicken pieces to the pan and toss to coat. Cook over medium heat, stirring occasionally, until the sauce thickens and becomes glossy, about 4 to 6 minutes. The internal temperature of the chicken should reach 165°F. The cornstarch will help the sauce cling and form a glaze. Serve: Serve immediately over steamed rice or creamy mashed potatoes, spooning additional sauce over the top. Garnish with thinly sliced green onions or sesame seeds for contrast.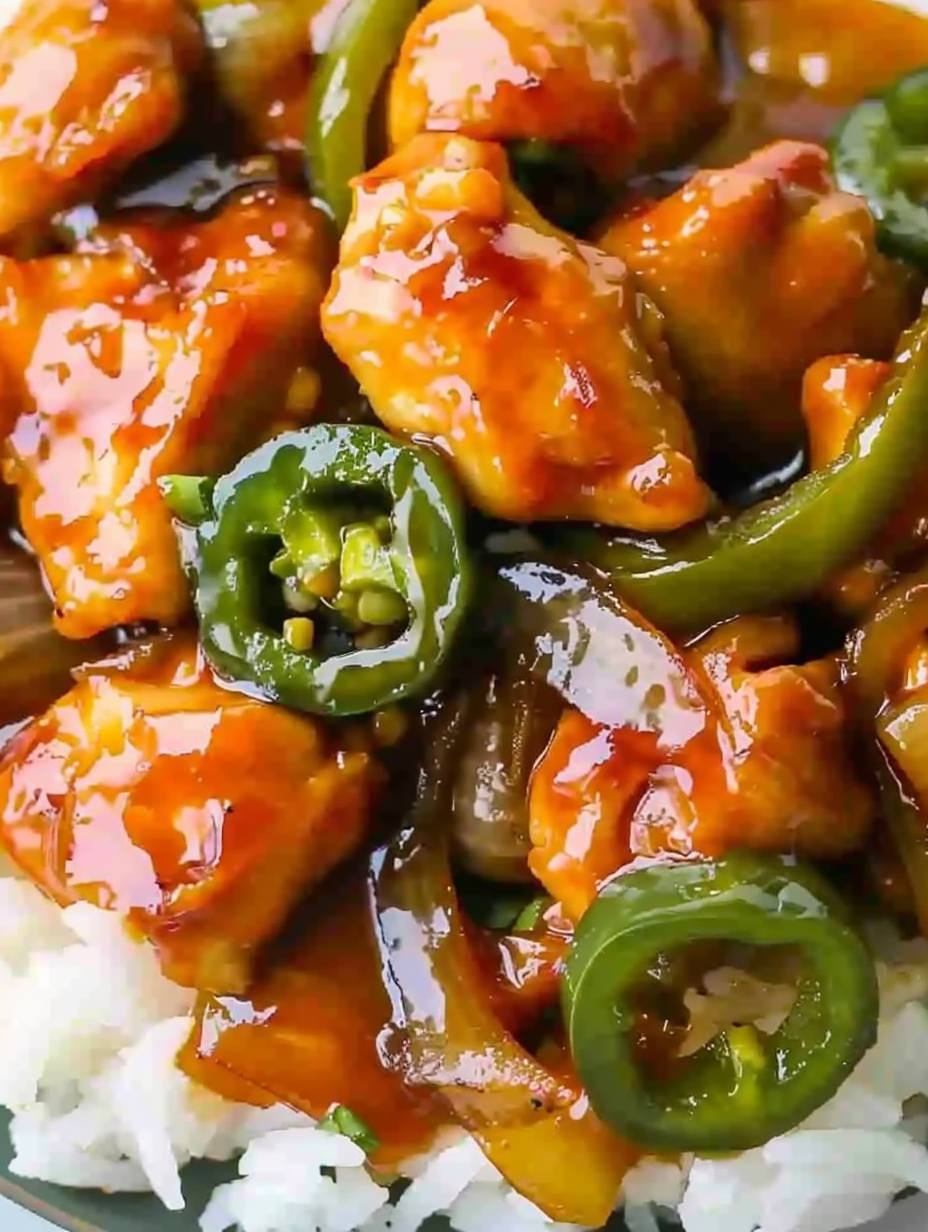
You Must Know
- This preparation yields about 4 servings and is relatively high in calories and sodium; it’s best enjoyed in moderation or paired with lighter sides.
- Leftovers keep well refrigerated up to 3 days and freeze nicely for up to 3 months in a freezer-safe container. Thaw overnight in the fridge before reheating.
- The dish is high in protein but also calorie-dense due to the frying oil and sugar-rich glaze; reduce oil and sugar for a lighter version.
- Searing at medium-high heat and finishing in the sauce ensures juicy chicken and a glossy coating — avoid overcooking during the sear.
My favorite aspect is how forgiving this dish is: the sauce tolerates adjustments well, and the basic method translates to other proteins. At a casual dinner with friends, I swapped in shrimp and saw the same crowd-pleasing result; the technique is versatile and reliably satisfying.

Storage Tips
Cool leftovers to room temperature for no more than two hours, then transfer to airtight containers. Refrigerate up to 3 days; for longer storage, freeze in meal-sized portions for up to 3 months. Reheat gently on the stovetop over low heat with a splash of water or soy sauce to revive the glaze, or microwave covered in short bursts, stirring in between to prevent drying. If the coating becomes overly thick after refrigeration, add a teaspoon of oil or a tablespoon of water while reheating to loosen the glaze.
Ingredient Substitutions
To reduce sodium, substitute low-sodium soy sauce or tamari (note: tamari is gluten-free). Swap brown sugar for honey or maple syrup for a different sweetness profile — start with 1/4 cup and adjust to taste. Use chicken thighs cut into strips if you prefer darker meat; they stay moist and add richer flavor. For a gluten-free option, use gluten-free soy sauce and double-check cornstarch cross-contamination. To cut fat, shallow-fry the chicken in just a few tablespoons of oil or oven-bake at 425°F for 12–15 minutes, flipping once.
Serving Suggestions
Serve over steamed jasmine or basmati rice to soak up the sauce, or spoon over creamy mashed potatoes for a comforting twist. Bright, crisp sides like a simple cucumber salad or quick pickled red onions provide acid to balance the glaze. Garnish with sesame seeds and sliced scallions for color and texture. For a lighter bowl, serve over mixed greens with a squeeze of lime and extra jalapeño slices.
Cultural Background
This preparation borrows flavors from American-Chinese home-style cooking — sweet-savory glazes, cornstarch dredges, and quick skillet finishes are familiar techniques. Ketchup and brown sugar create the backbone of many Americanized stir-fry sauces, while fresh jalapeños introduce a Southwestern heat. The result is a hybrid that showcases how immigrant cuisines adapt to local ingredients and home-cooking preferences.
Seasonal Adaptations
In summer, use fresh ripe jalapeños and add thin slices of summer bell pepper for color and sweetness. In winter, swap fresh jalapeños for jarred pickled jalapeños in the sauce for brightness, and finish with a sprinkle of toasted sesame for warmth. Holiday variations can include dried cranberries for a sweet-tart contrast when serving over mashed potatoes at a family gathering.
Meal Prep Tips
Dredge and store chicken in the refrigerator the night before to cut prep time in half. Pre-mix the sauce in a jar and refrigerate; reheat and combine with quickly browned chicken for a 15-minute finish. Portion cooked chicken with rice into freezer-safe containers for grab-and-go lunches. Use microwave-steamable rice pouches alongside the reheated chicken for super-fast weeknight meals.
There’s joy in taking a simple set of ingredients and turning them into something reliably delicious. This Jalapeño Chicken has earned a regular spot in my weeknight rotation — I hope it becomes one of yours as well. Make it your own by adjusting heat and sweetness, and don’t be afraid to swap proteins when inspiration strikes.
Pro Tips
Pat chicken dry before dredging to help the cornstarch adhere for a crisp crust.
Sear quickly over medium-high heat to color the exterior but finish cooking in the sauce for juiciness.
Taste the sauce before adding the chicken and adjust sugar or vinegar to balance sweet and tangy.
If reheating, add a splash of water or soy sauce to loosen the glaze and prevent dryness.
Seed jalapeños for milder heat or keep seeds for more intensity; always slice away from your hands and eyes.
This nourishing crispy jalapeño chicken with sweet-spicy glaze recipe is sure to be a staple in your kitchen. Enjoy every moist, high protein slice — it is perfect for breakfast or as a wholesome snack any time.
FAQs about Recipes
How should I store leftovers?
Refrigerate within two hours in an airtight container and use within 3 days. Freeze up to 3 months.
Can this be made gluten-free?
Yes — use low-sodium soy sauce or tamari for a gluten-free option, and check labels to ensure no hidden wheat.
Tags
Crispy Jalapeño Chicken with Sweet-Spicy Glaze
This Crispy Jalapeño Chicken with Sweet-Spicy Glaze recipe makes perfectly juicy, tender, and flavorful steak every time! Serve with potatoes and a side salad for an unforgettable dinner in under 30 minutes.
Ingredients
Chicken
Frying
Sauce & Aromatics
Instructions
Toss Chicken with Cornstarch
Pat chicken dry. In a large mixing bowl, toss 1 pound of chicken tenderloins with 1/2 cup cornstarch until evenly coated. Rest 5 minutes to let the coating adhere.
Heat Oil and Sear
Heat 1 cup high-temperature oil in a large skillet over medium-high heat until shimmering. Brown chicken quickly, about 1-2 minutes per side, aiming for color not full doneness. Transfer to paper towels to drain.
Sauté Aromatics
Discard most oil, leaving about 1 tablespoon or wipe clean and add 2 teaspoons sesame oil. Sauté chopped onion and sliced jalapeños over medium heat until softened and slightly browned, about 4-5 minutes.
Make the Sauce
Add 1/3 cup light soy sauce, 1/3 cup ketchup, 1/3 cup brown sugar, 2 teaspoons vinegar, and 4 cloves minced garlic. Whisk to combine and bring to a gentle simmer. Adjust sweetness or acidity to taste.
Finish Chicken in Sauce
Return chicken to the skillet and toss to coat. Cook over medium heat until sauce thickens and chicken reaches 165°F, about 4-6 minutes. Serve immediately over rice or mashed potatoes.
Last Step: Please leave a rating and comment letting us know how you liked this recipe! This helps our business to thrive and continue providing free, high-quality recipes for you.
Nutrition
Did You Make This?
Leave a comment & rating below or tag
@silksavor on social media!
Categories:
You might also like...

Parmesan Herb Crusted Salmon
Tender baked salmon crowned with a garlicky Parmesan herb crust, bright lemon, and buttery crunch. Simple to make, stunning to serve, and irresistibly flavorful.

Caramel Apple Cheesecake Bars
Buttery graham crust, silky cheesecake, and cinnamon-kissed apples under a crunchy crumb, finished with glossy caramel. A fall crowd-pleaser you will crave.

Homemade Green Bean Casserole
Tender green beans in silky mushroom cream, crowned with crispy onions. A comforting holiday side made entirely from scratch that always disappears fast.
Did You Make This?
Leave a comment & rating below or tag @silksavor on social media!
Rate This Recipe
Share This Recipe
Enjoyed this recipe? Share it with friends and family, and don't forget to leave a review!
Comments (1)
This recipe looks amazing! Can't wait to try it.
Comments are stored locally in your browser. Server comments are displayed alongside your local comments.

Hi, I'm Julia!
What's Popular

30-Minute Meals!
Join to receive our email series which contains a round-up of some of our quick and easy family favorite recipes.