
No-Bake Brownie Truffles

Thick, moist, and fudge-like brownie bites coated in silky chocolate — no baking required. Perfect for parties, gifts, and last-minute dessert cravings.
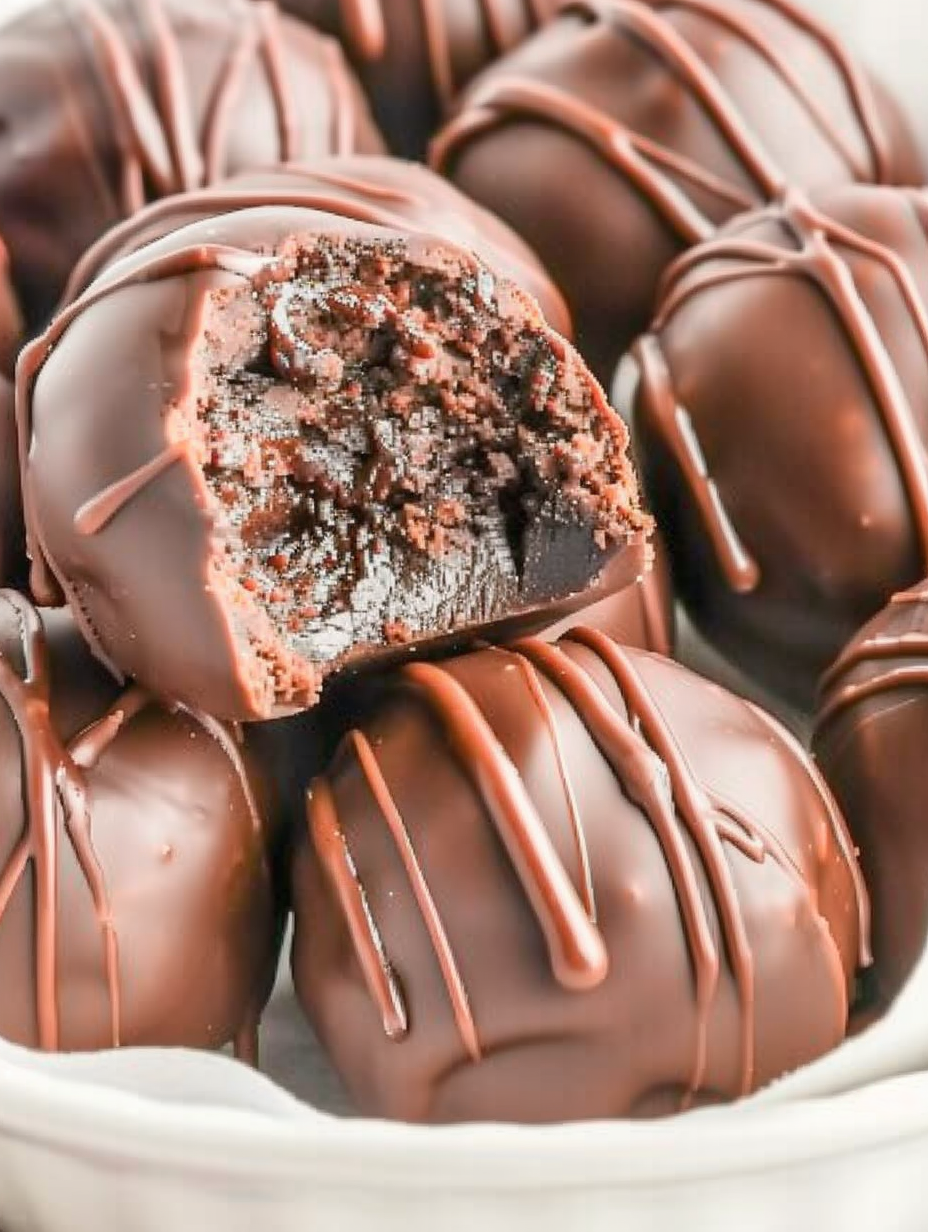
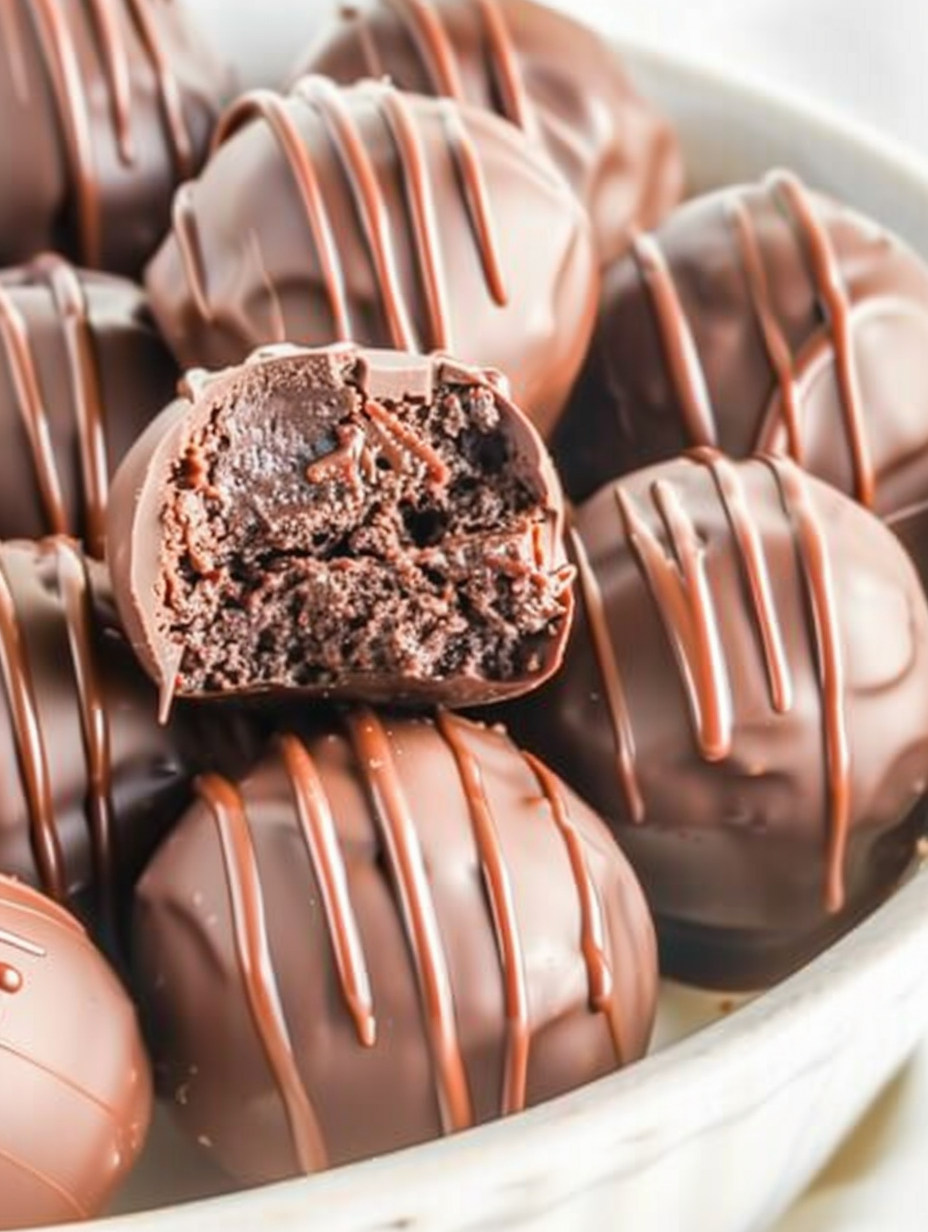
This recipe for brownie truffles has been my go-to when I want serious chocolate satisfaction without firing up the oven. I first made these on a rainy afternoon while trying to avoid turning the house into a sauna, and what started as a pantry salvage moment turned into a family obsession. The base is essentially boxed brownie mix combined with cream cheese for richness, rolled into firm little balls and dipped in molten coating — the results are thick, moist, soft, and intensely fudgy. They taste like brownie batter but with a slightly denser, ganache-adjacent texture that melts on the tongue.
I love how fast these come together: active hands-on time is under half an hour, and the chilling does the heavy lifting. They’re ideal for small gatherings, holiday cookie trays, or a homemade gift packaged in a pretty tin. Because there’s no baking, the flavor stays like freshly mixed batter, and the outer chocolate shell provides a satisfying snap. My kids declared them "better than the brownies," and I now bring them to potlucks and school events where they vanish first.
Why You'll Love This Recipe
- Ready in roughly 25 minutes of active prep — great for quick dessert fixes when you don’t want to bake.
- Uses pantry staples and one boxed mix, so you can pull them together even if you don't have a full baking pantry.
- No-bake method preserves that brownie-batter flavor and keeps the truffles luxuriously moist and fudgy.
- Make-ahead friendly: you can shape them and freeze before dipping, or fully finish and chill for easy transport.
- Perfect for gifting: they travel well when chilled and look polished with a drizzle or sprinkles.
- Child-friendly shaping makes this a fun activity to do with kids or as a group kitchen project.
I remember making a double batch the week I hosted a game night; neighbors raved about the texture and the contrast between the silky coating and the dense center. Over time I've tweaked the balance between melting wafers and shortening to get consistently smooth shells and a glossy finish that doesn't craze or weep.
Ingredients
- 18.3-ounce box fudge brownie mix (heat-treated): Use a reliable brand like Ghirardelli or Betty Crocker; heat treating the mix is essential if using it uncooked to address any food-safety concerns indicated on the box. The boxed mix provides that concentrated fudgy flavor that forms the backbone of these bites.
- 8-ounce block cream cheese, softened: Full-fat cream cheese gives the best flavor and texture. Make sure it’s softened to room temperature for smooth mixing; if chilled, cubes will form and make shaping harder.
- 1 teaspoon vanilla extract: Pure vanilla amplifies the chocolate notes; avoid artificial extracts if possible for a cleaner finish.
- 1 1/2 cups chocolate melting wafers: These are designed to melt smoothly and set glossy. Choose dark, milk, or semi-sweet according to preference; reserve about 1/4 cup for drizzling.
- 1 tablespoon Crisco shortening: Shortening thins the melted wafers slightly and increases sheen. You can use coconut oil as an alternative if you prefer.
Instructions
Step 1 — Prep the workspace:Line a large baking sheet with parchment paper and set aside. Have a medium mixing bowl, 1 1/2-inch cookie scoop, two forks or dipping tools, and a large heatproof bowl ready for the double boiler. Chill time is key, so make space in your refrigerator.Step 2 — Combine the base:In the medium bowl, beat together the brownie mix, softened cream cheese, and vanilla until fully combined into a uniform, dough-like mass. Use a spatula or hand mixer on low — the mixture should be cohesive and slightly tacky but firm enough to hold shape.Step 3 — Shape the truffles:Using a 1 1/2-inch cookie scoop, portion the dough and roll each portion between your palms into a smooth ball. Aim for consistent sizes to ensure even chilling and coating. Place each ball on the parchment-lined sheet. If the dough sticks, lightly flour your hands or chill briefly.Step 4 — Initial chill:Refrigerate the tray of truffles for 1 hour to firm up the centers. This step prevents the truffles from breaking apart when dipped and helps the coating set cleanly.Step 5 — Melt the coating:About 5–10 minutes before the hour is up, set a large heatproof bowl over a pot with 3–4 inches of simmering water (double boiler). Add the melting wafers, keeping back 1/4 cup for garnish, and stir frequently until melted and glossy. Add 1 tablespoon shortening and stir until fully incorporated; remove from heat.Step 6 — Dip the truffles:Using two forks or dipping tools, submerge each chilled ball into the melted coating, rolling to cover completely. Allow excess coating to drip off before returning to the parchment. Work efficiently — if the coating begins to thicken, briefly reheat over the double boiler to loosen.Step 7 — Chill to set the shells:Place the coated truffles in the refrigerator for 30 minutes to set the shell. This ensures a clean, crisp bite when serving.Step 8 — Drizzle decoration:Reheat the reserved melting wafers with a touch more shortening until smooth. Transfer to a piping bag or small plastic bag with the corner snipped and drizzle lines over each truffle. Return to the refrigerator for a final 30 minutes to fully firm.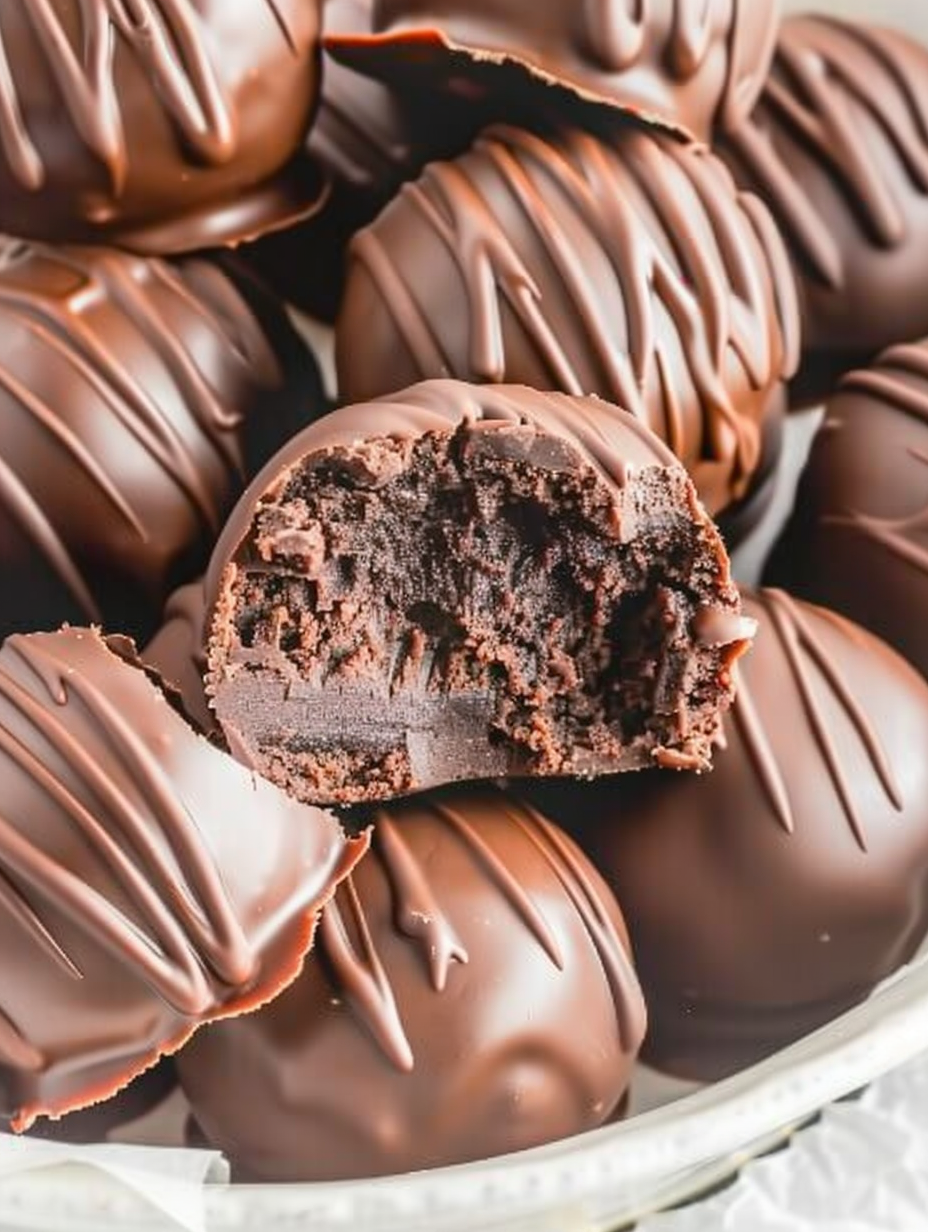
You Must Know
- These keep well refrigerated for up to 10 days in an airtight container; they also freeze for up to 3 months — thaw in the fridge before serving.
- Because there’s no baking step, follow any heat-treatment directions on the boxed mix if the manufacturer recommends it.
- Melting wafers with a small amount of shortening creates a shinier shell that’s less prone to cracking when bitten.
- Truffles are high in calories per bite (approximately 232 kcal each) — perfect as an indulgent treat or small dessert portion.
My favorite part is how portable these are: I once prepared dozens for a bake sale and used small cupcake liners to keep them tidy. Friends loved the contrast between the snap of the shell and the fudgy interior. Over time I learned to reserve extra wafers for decoration and to always chill the centers before dipping to avoid oily fingerprints on the coating.
Storage Tips
Store finished truffles in a single layer or layered with parchment between tiers inside an airtight container. Keep refrigerated to maintain the shell’s snap and the center’s density; they’ll last up to 10 days chilled. For longer storage, freeze on a tray until firm, transfer to a freezer-safe bag, and keep for up to 3 months. To serve from frozen, move them to the refrigerator for several hours to thaw gently — avoid room-temperature thawing for long periods, which can cause condensation on the chocolate coating. When transporting, pack truffles with a small cold pack to prevent melting and shifting.
Ingredient Substitutions
If you need dairy-free options, substitute the cream cheese with a stable vegan cream cheese and choose dairy-free melting wafers; note the texture will be slightly different and possibly less rich. For gluten-free, use a certified gluten-free brownie mix — the flavor will remain familiar but check the mix for binding differences. Shortening can be swapped for fractionated coconut oil for a cleaner label, but coconut flavor may be noticeable. To reduce sweetness, choose semi-sweet or dark melting wafers and consider adding a pinch of fine sea salt to the base to balance the candy coating.
Serving Suggestions
Serve chilled on small paper liners for elegant presentation. Pair with bitter espresso or a nutty amaro to cut the richness, or offer with a side of fresh raspberries to add bright acidity. For entertaining, arrange assorted drizzles and sprinkles on top — flake sea salt, chopped toasted nuts, or freeze-dried raspberry dust all add color and contrast. These work well on dessert charcuterie boards alongside cookies and candies for variety.
Cultural Background
Brownie truffles are an American adaptation of classic truffle concepts combined with boxed baking convenience. The idea of rolling confectionery centers in coatings is centuries old, but the no-bake boxed-mix version is an example of modern, time-saving home cooking that became popular in the late 20th century. They reflect a trend of turning leftovers or batter-like mixtures into bite-sized confections for easy sharing and gifting at holidays and gatherings.
Seasonal Adaptations
Winter: add 1/4 teaspoon ground cinnamon and a pinch of nutmeg to the base, and top with crushed peppermint candy for a festive touch. Spring/Summer: swap the drizzle for white chocolate and scatter chopped pistachios and edible flowers. Fall: stir 1/4 cup finely chopped toasted pecans into the base for texture. For holidays, use colored melting wafers to match the occasion or dip half in dark chocolate and half in milk to create visual variety.
Meal Prep Tips
Scale the ingredients to make multiple batches and freeze them before dipping — frozen centers are easier to handle and result in thinner, neater shells. Portion onto trays and flash-freeze for 30–60 minutes, then store frozen dough balls in a zip-top bag until needed. When ready to finish, dip from frozen and allow extra chilling time. For gifting, layer truffles in a box separated by parchment and include a small cold pack for transport.
These brownie truffles are an easy, crowd-pleasing way to deliver maximum chocolate impact with minimal time. They’re flexible, forgiving, and always a hit — give them a try and tweak the coatings and garnishes until they reflect your signature style.
Pro Tips
Soften the cream cheese to room temperature for easier mixing and a smoother texture.
Chill the shaped balls thoroughly before dipping to prevent them from falling apart in the coating.
Reserve some melting wafers before melting for drizzle decoration; it saves reheating the whole batch.
Use a 1 1/2-inch cookie scoop for uniform truffles and consistent chilling and coating.
If the coating thickens while you dip, return it briefly to the double boiler and stir to smooth.
This nourishing no-bake brownie truffles recipe is sure to be a staple in your kitchen. Enjoy every moist, high protein slice — it is perfect for breakfast or as a wholesome snack any time.
FAQs about Recipes
Can I freeze these?
Yes. Freeze shaped truffle centers on a tray until firm, then transfer to an airtight container or bag for up to 3 months. Dip from frozen and allow extra setting time.
How do I get a shiny coating?
Use a small amount of shortening or coconut oil when melting wafers to ensure a smooth, glossy coating that won’t crack easily.
Tags
No-Bake Brownie Truffles
This No-Bake Brownie Truffles recipe makes perfectly juicy, tender, and flavorful steak every time! Serve with potatoes and a side salad for an unforgettable dinner in under 30 minutes.
Instructions
Prepare workspace
Line a baking sheet with parchment and gather tools: mixing bowl, cookie scoop, double boiler components, forks for dipping, and piping bag for drizzle.
Make the truffle base
In a medium bowl, beat the brownie mix, softened cream cheese, and vanilla until a uniform, dough-like mass forms. Ensure no lumps of cream cheese remain.
Portion and shape
Use a 1 1/2-inch scoop to portion and roll each into a smooth ball with your palms; place on parchment. Consistency in size ensures even chilling and coating.
Chill the centers
Refrigerate the trays of shaped balls for 1 hour to firm the centers and make dipping easier and cleaner.
Melt the coating
Set a heatproof bowl over simmering water and melt the wafers, reserving 1/4 cup for decoration. Add 1 tablespoon shortening and stir until glossy and smooth, then remove from heat.
Dip the truffles
Using two forks or dipping tools, submerge a chilled ball into the melted coating, roll to coat, let excess drip, and place back on parchment. Repeat until all are coated.
Chill to set
Refrigerate coated truffles for 30 minutes to set the shells before drizzling.
Drizzle and finish
Melt the reserved wafers with a touch of shortening, pipe thin lines over each truffle, and chill for an additional 30 minutes before serving.
Last Step: Please leave a rating and comment letting us know how you liked this recipe! This helps our business to thrive and continue providing free, high-quality recipes for you.
Nutrition
Did You Make This?
Leave a comment & rating below or tag
@silksavor on social media!
Categories:
You might also like...

Parmesan Herb Crusted Salmon
Tender baked salmon crowned with a garlicky Parmesan herb crust, bright lemon, and buttery crunch. Simple to make, stunning to serve, and irresistibly flavorful.

Caramel Apple Cheesecake Bars
Buttery graham crust, silky cheesecake, and cinnamon-kissed apples under a crunchy crumb, finished with glossy caramel. A fall crowd-pleaser you will crave.

Homemade Green Bean Casserole
Tender green beans in silky mushroom cream, crowned with crispy onions. A comforting holiday side made entirely from scratch that always disappears fast.
Did You Make This?
Leave a comment & rating below or tag @silksavor on social media!
Rate This Recipe
Share This Recipe
Enjoyed this recipe? Share it with friends and family, and don't forget to leave a review!
Comments (1)
This recipe looks amazing! Can't wait to try it.
Comments are stored locally in your browser. Server comments are displayed alongside your local comments.

Hi, I'm Julia!
What's Popular

30-Minute Meals!
Join to receive our email series which contains a round-up of some of our quick and easy family favorite recipes.