
>>

Warm, irresistible pockets of molten peanut butter tucked into flaky pie crust — a quick, crowd-pleasing dessert that delivers gooey, nostalgic comfort in every bite.
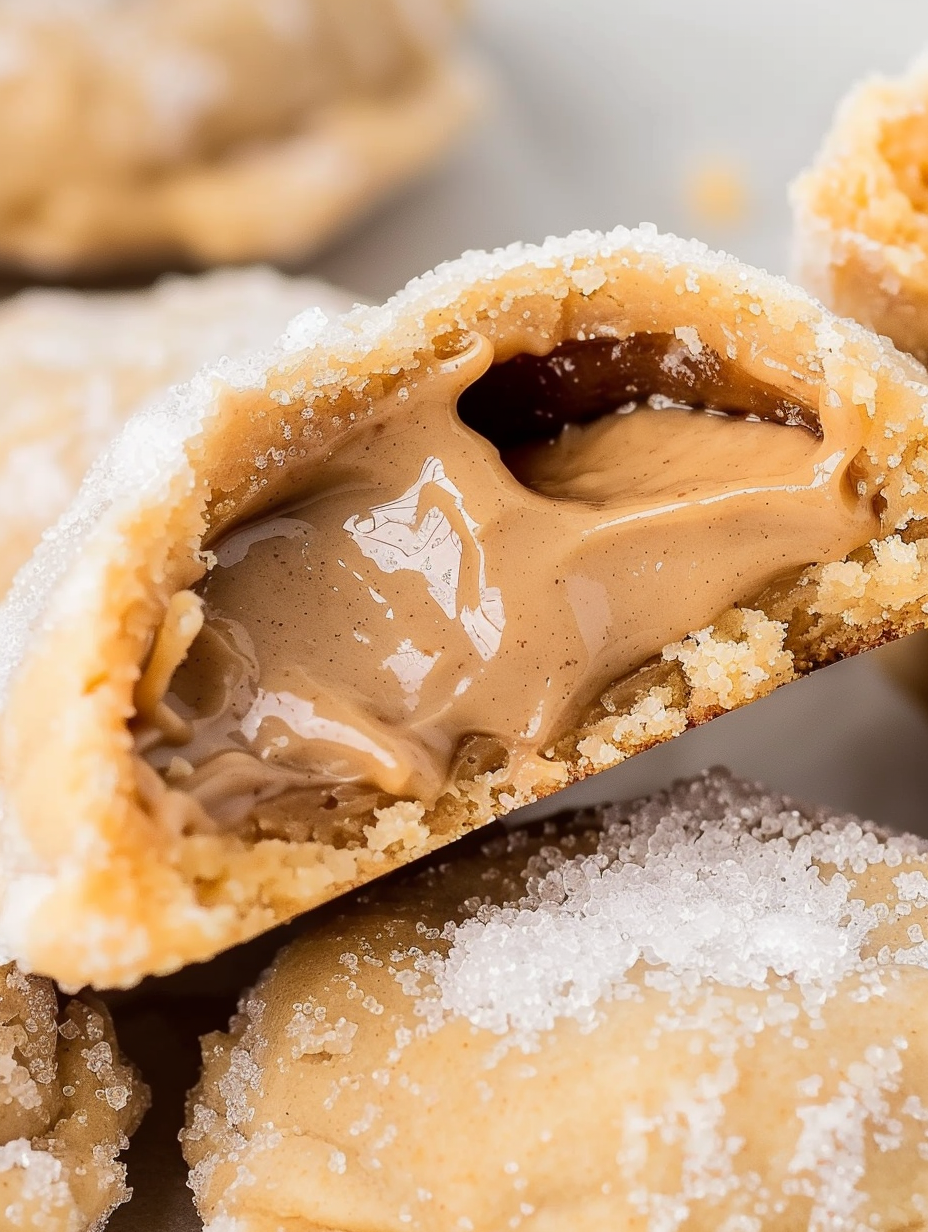
This recipe for Peanut Butter Lava Cookies is a small, delicious miracle I first discovered on a rainy Saturday when I wanted something ridiculously comforting but also fast. I had a roll of premade pie crust tucked at the back of the fridge and a jar of JIF Original Creamy peanut butter that had been begging to be showcased. One bite of the first warm cookie and I knew I had uncovered something special: a crisp, delicate shell that gives way to an ooey-gooey, molten peanut butter center. It quickly became the dessert I bring to potlucks and the secret midnight snack my family fights over.
What makes these cookies so memorable is the contrast of textures: the flaky, almost pastry-like exterior of the pie crust and the hot, silky peanut butter that slowly firms as it cools. They’re startlingly simple — three main ingredients and basic tools — but the execution matters. Timing, sealing, and a light hand with the sugar are the small details that turn good results into perfect molten pockets. I’ll walk you through every step, share troubleshooting tips, and give ideas for storing and adapting them through the seasons.
In my experience, these have become the recipe I reach for when I want something decadent but quick. My kids announced them as their new favorite after-school treat, and friends at a recent picnic asked for the recipe on the spot. The simplicity makes it a reliable crowd-pleaser every time.
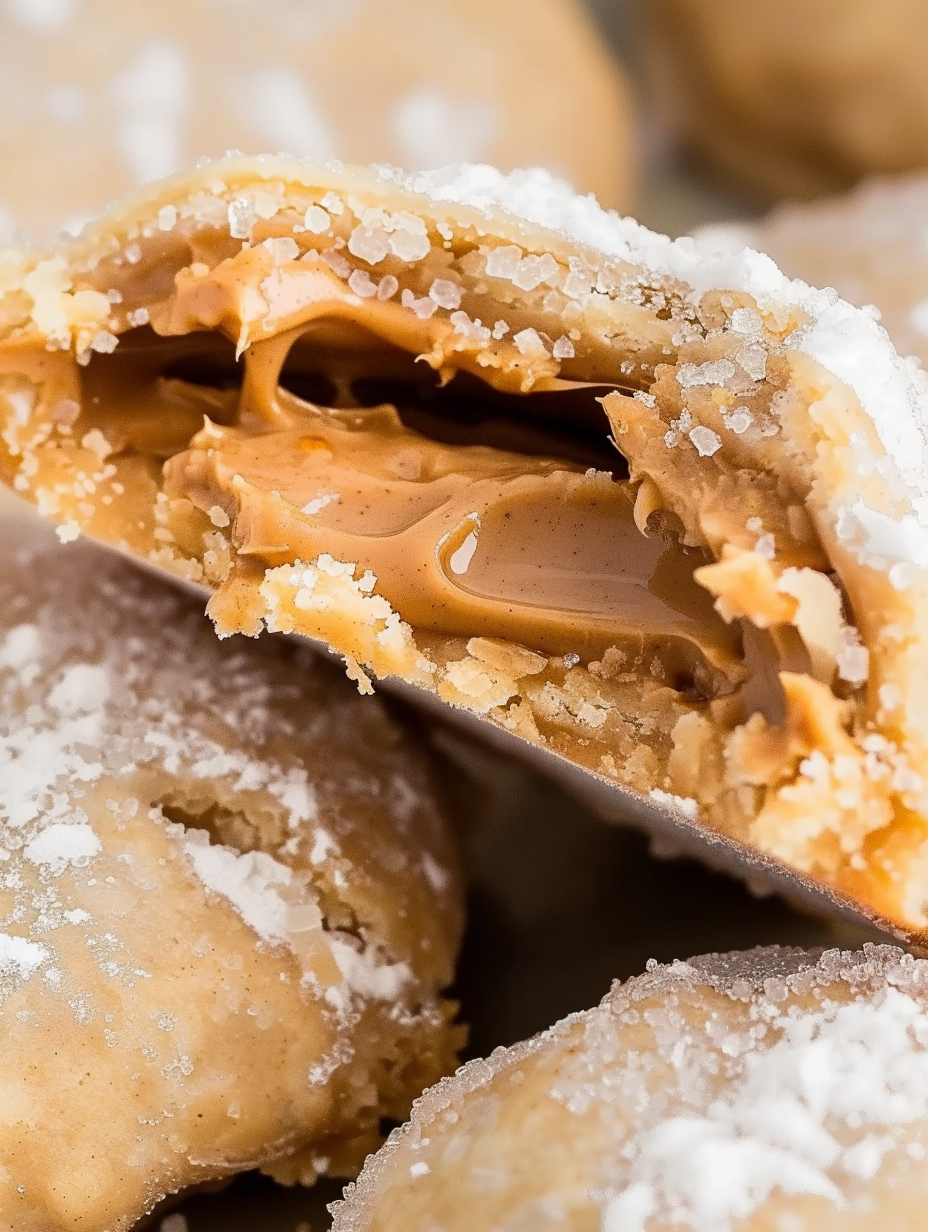
My favorite part is watching the first cookie get broken open at a family gathering — the warm peanut butter slowly oozes out and every single person leans in for a taste. They’re deceptively elegant for how quickly they come together, and I love that they appeal to both kids and grown-ups.
Store cooled cookies in an airtight container at room temperature for up to 24 hours; beyond that, refrigerate for up to 3 days to preserve the crust and prevent the peanut butter from becoming too fluid at warm room temperatures. For longer storage, freeze baked cookies in a single layer until solid, then transfer to a freezer-safe bag for up to 1 month. Reheat frozen cookies in a 325°F oven for 6–8 minutes or microwave for brief bursts until warm. Use parchment or silicone-lined containers to avoid sticking and keep the crust crisp.
If you don’t have JIF, choose any smooth, full-fat peanut butter for the best molten texture. Crunchy peanut butter will create pockets of texture but may not flow as smoothly. For a dairy-free shell, seek a premade crust labeled dairy-free — many are made with vegetable shortening. To make them chocolatey, add 1 teaspoon of cocoa to each peanut butter dollop or place a small square of dark chocolate under the peanut butter. Using natural peanut butter (oil-separated) will give a slightly looser center; stir well before measuring.
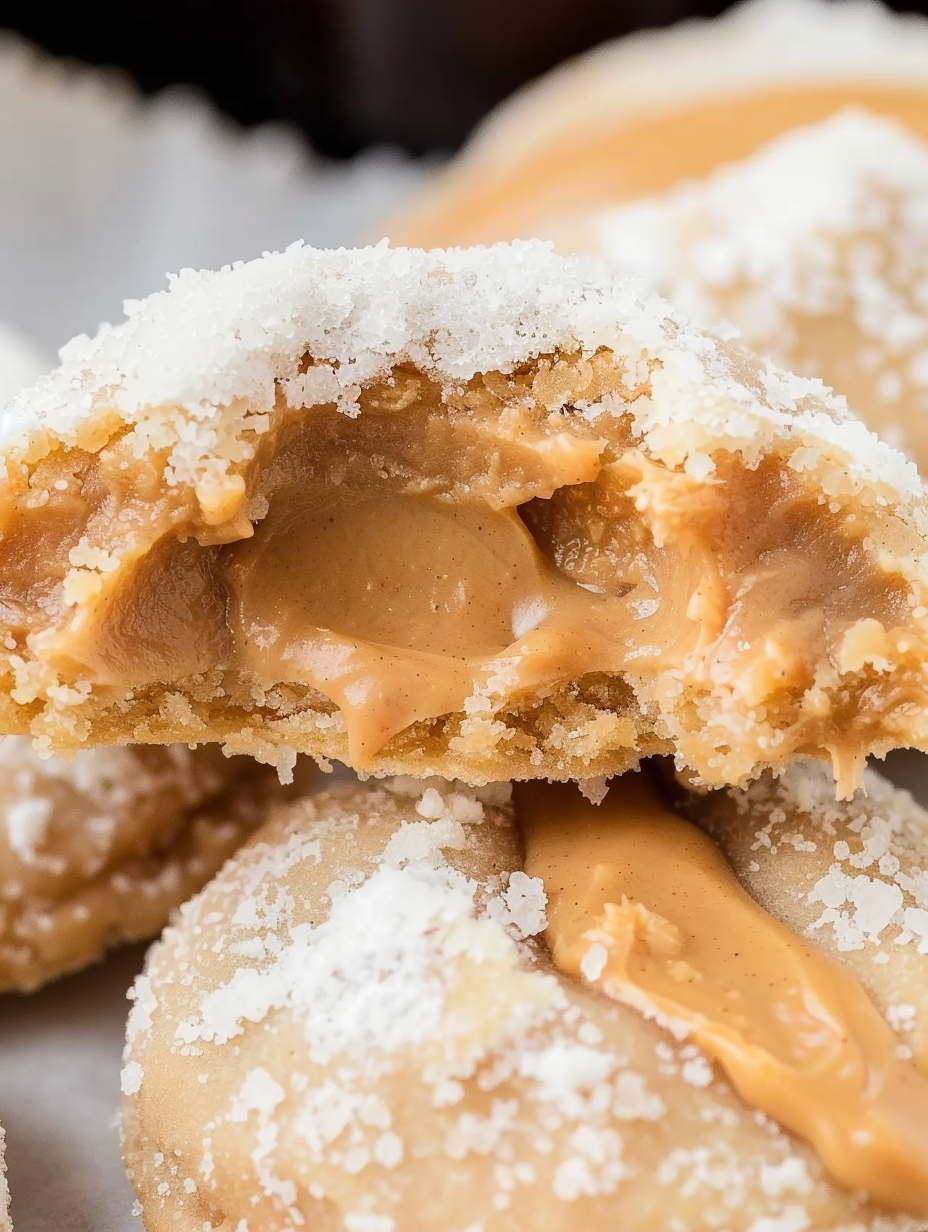
Serve warm with a dusting of powdered sugar or a drizzle of warm chocolate sauce for an indulgent presentation. Pair with vanilla ice cream for contrast between hot and cold, or place on a dessert board next to fresh berries to cut through the richness. For casual gatherings, arrange on a platter lined with parchment and garnish with a few whole peanuts for texture and visual appeal.
Peanut butter is an American pantry staple with roots in the late 19th and early 20th centuries. Combining it with pastry is a playful twist that highlights the American love of simple, sweet-salty contrasts. These cookies riff on filled pastries and hand pies — portable, comforting, and designed to deliver concentrated flavor in a single bite. They’re the kind of homey invention that spreads by word of mouth at potlucks and family gatherings.
In cooler months, add a pinch of ground cinnamon or pumpkin spice to the peanut butter for a warm seasonal note. For summer, swap in a spoonful of apricot jam under the peanut butter for a sweet-tangy contrast or use salted caramel candies for a crunchy, caramelized center. Holiday versions can include a mini peppermint patty beneath the peanut butter for a festive twist.
To streamline baking for a crowd, assemble all sandwiches and freeze them individually on a tray, then store them in a single bag. On the day you need them, place frozen cookies on parchment and bake directly from frozen, adding 2–3 minutes. For consistent portions, use a tablespoon scoop for peanut butter and a 3-inch cutter so every cookie bakes at the same rate. Label containers with bake-from-frozen times to save headspace when entertaining.
These Peanut Butter Lava Cookies are a tiny, spectacular way to turn pantry staples into a memorable dessert. They’re forgiving, quick, and universally adored — give them a try, and don’t be surprised if they become a regular request at your table.
Use room-temperature pie crusts to avoid tearing and to achieve an even bake.
Keep the sugar on the peanut butter, not the edges, to ensure a proper seal between crust layers.
Bake just until the edges begin to brown — overbaking will eliminate the molten center.
Freeze assembled cookies on a tray before storing to prevent sticking and preserve shape.
This nourishing peanut butter lava cookies recipe is sure to be a staple in your kitchen. Enjoy every moist, high protein slice — it is perfect for breakfast or as a wholesome snack any time.
Yes. You can assemble the sandwiches and freeze on a tray, then transfer to a freezer bag for up to 1 month. Bake from frozen and add 2–3 minutes to the bake time.
The center will be molten when warm and will firm up as the cookie cools. Allow cooling for 2 minutes before serving and warn guests the center will be hot.
This Peanut Butter Lava Cookies recipe makes perfectly juicy, tender, and flavorful steak every time! Serve with potatoes and a side salad for an unforgettable dinner in under 30 minutes.
Preheat the oven to 400°F and set a rack in the middle. Remove both premade pie crusts from the box and let them reach room temperature per package directions to ensure pliability.
Unroll one crust onto parchment and roll out slightly to about 1/16th–1/8th inch thickness. Use a 3-inch round cutter or glass to cut as many circles as possible, reserving scraps to reroll.
Place 1 tablespoon of peanut butter in the center of each round and sprinkle 1/8 teaspoon granulated sugar on the peanut butter only to add texture and brightness.
Top with a second round and firmly pinch the edges to seal. Use a fork to crimp the border for extra security and a decorative finish.
Gently toss each cookie in granulated sugar, place on a parchment-lined baking sheet, and bake at 400°F for 12 minutes or until the edges begin to brown. Avoid overbaking to preserve the molten center.
Remove from oven and cool on the baking sheet for 2 minutes. Serve warm for the best molten experience and warn guests the filling is hot.
While the first batch bakes, repeat the process with the second roll of crust. Reroll scraps as needed to get the remaining rounds.
Last Step: Please leave a rating and comment letting us know how you liked this recipe! This helps our business to thrive and continue providing free, high-quality recipes for you.
Leave a comment & rating below or tag
@silksavor on social media!

Tender baked salmon crowned with a garlicky Parmesan herb crust, bright lemon, and buttery crunch. Simple to make, stunning to serve, and irresistibly flavorful.

Buttery graham crust, silky cheesecake, and cinnamon-kissed apples under a crunchy crumb, finished with glossy caramel. A fall crowd-pleaser you will crave.

Tender green beans in silky mushroom cream, crowned with crispy onions. A comforting holiday side made entirely from scratch that always disappears fast.
Leave a comment & rating below or tag @silksavor on social media!
Enjoyed this recipe? Share it with friends and family, and don't forget to leave a review!
This recipe looks amazing! Can't wait to try it.
Comments are stored locally in your browser. Server comments are displayed alongside your local comments.

Join to receive our email series which contains a round-up of some of our quick and easy family favorite recipes.
