
>>

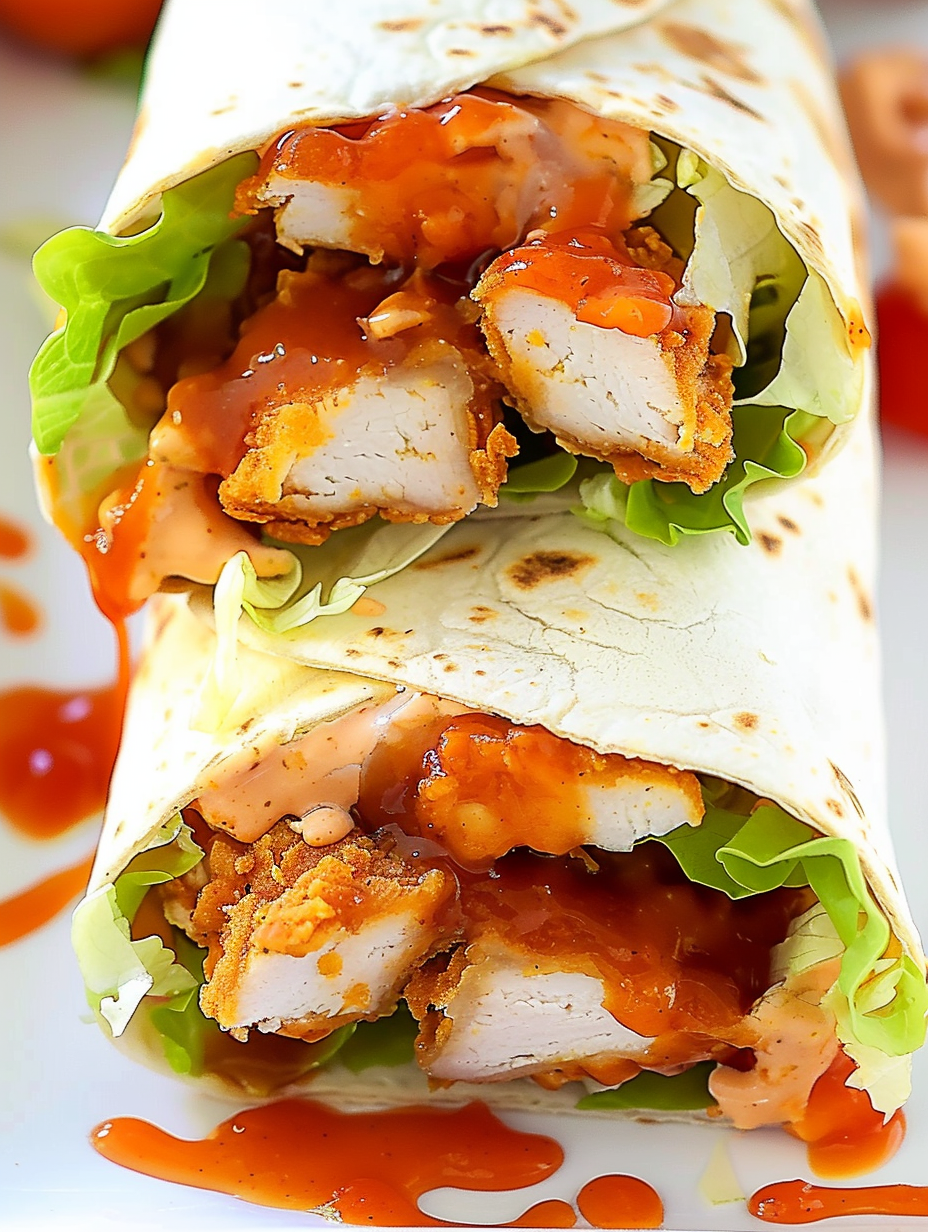
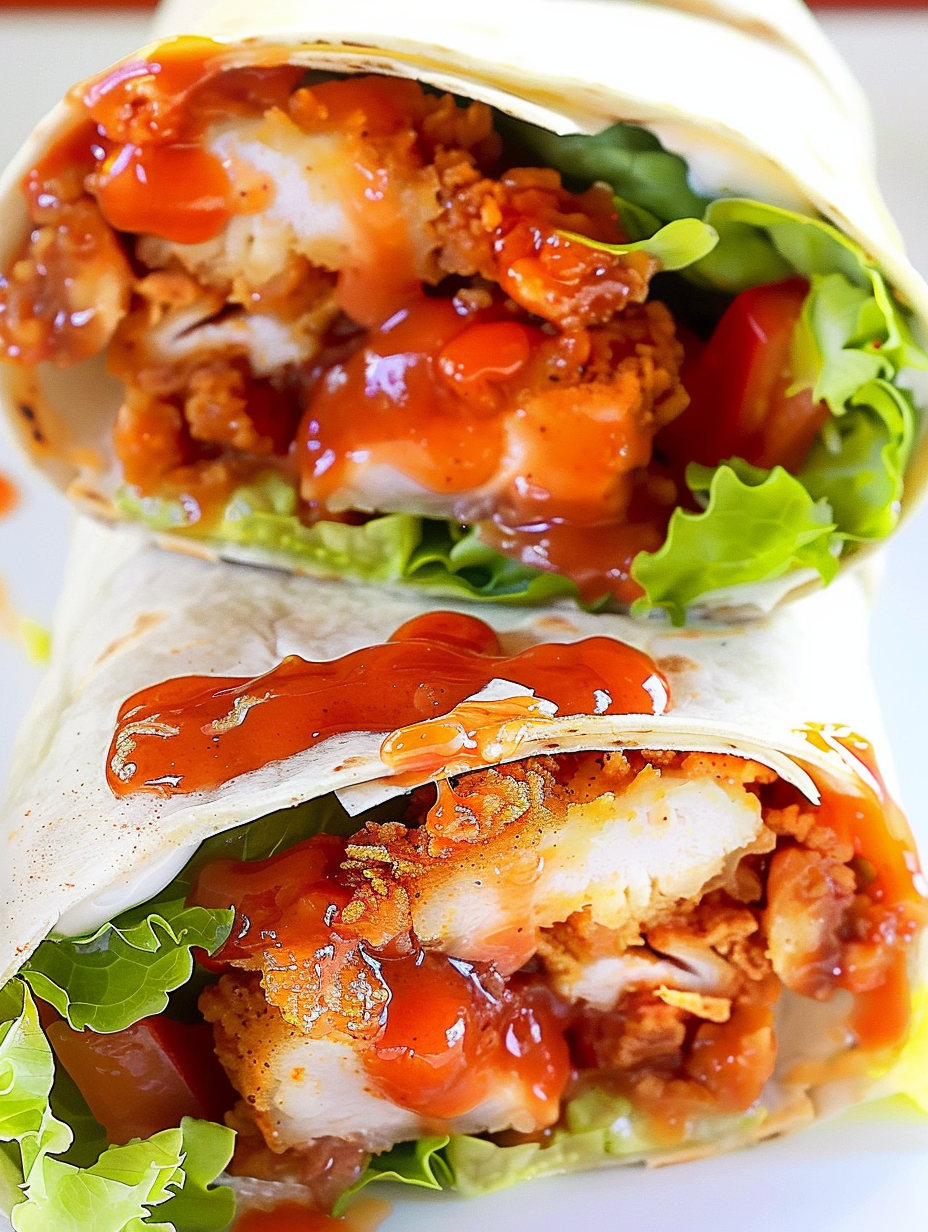
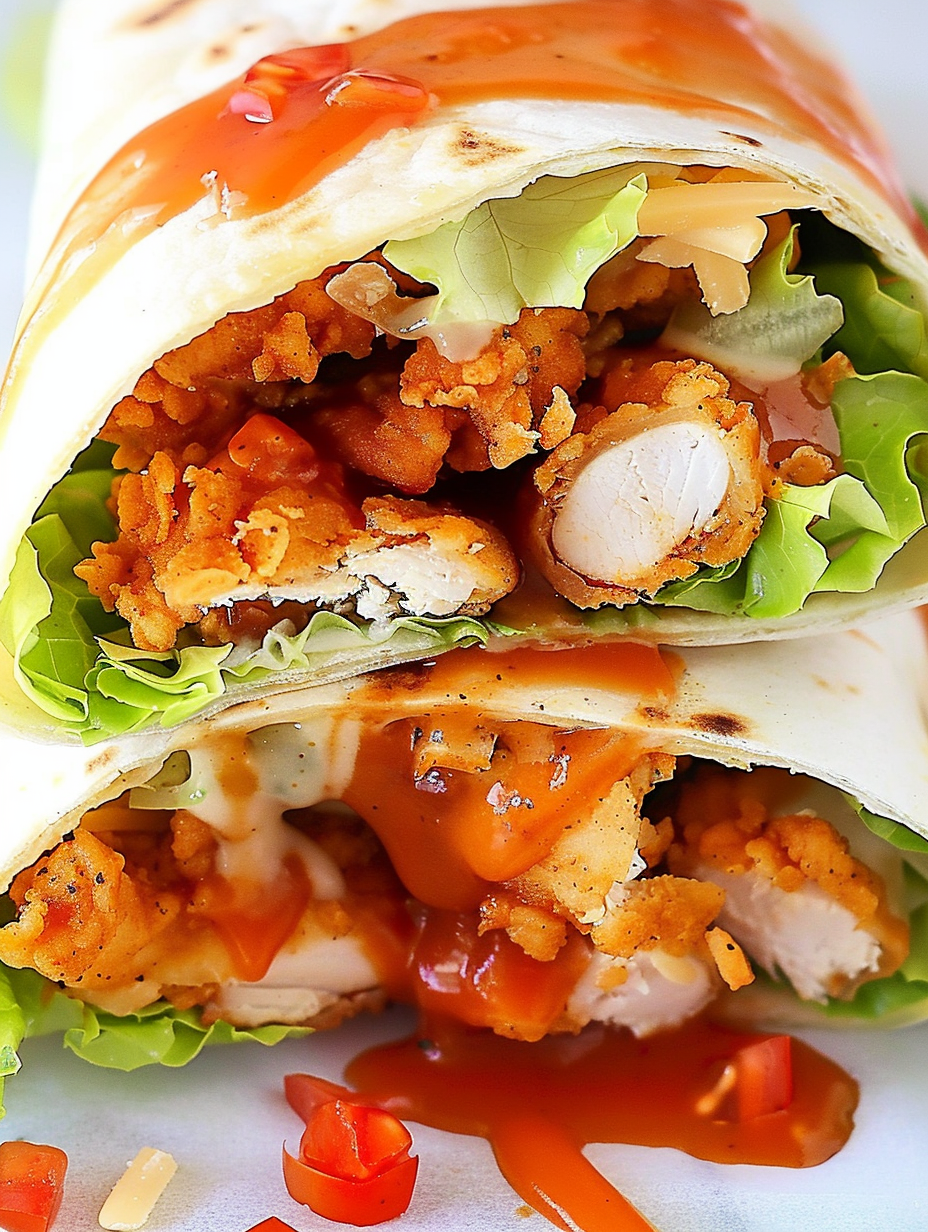
Sweet and spicy glazed chicken fingers tucked into warm burrito size tortillas with cheddar, lettuce and tomato for a quick and satisfying lunch or dinner.
This recipe started as a weeknight rescue and quickly became a crowd pleaser in my kitchen. I first combined sticky hot sauce and brown sugar one rainy afternoon when I had a pack of deli chicken fingers and a hungry family. The glaze clings to the breading and creates a shine and crunch contrast that feels indulgent yet simple. These wraps are great for lunch or dinner, and they travel well for picnics or school lunches when packed carefully.
The texture is the best part. The outside of the chicken fingers stays slightly crisp under a glossy, sweet and spicy coating, while the interior remains tender. Nestled inside a large flour tortilla with shredded cheddar, chopped lettuce and bright tomato slices, every bite balances heat, sugar, salt and fresh crunch. I learned to keep the sauce on the thicker side so it sticks, and to assemble just before serving so the tortilla does not get soggy.
When I first served these at a backyard get together, guests went back for seconds and asked for the recipe. My teenager calls these his sandwich of choice before sports practice. They work equally well as a picnic wrap or a fuss free dinner when the timetable is tight.
My favorite part is how reliably this combination pleases a crowd. I have packed these for road trips and served them at casual gatherings. The bright tang of the hot sauce cuts the brown sugar so the flavor stays balanced instead of cloying. Watching the sauce transform a simple chicken finger into something glossy and irresistible never gets old.
To maintain quality store leftover glaze in a small airtight container in the refrigerator for up to one week. Rewarm gently on the stove top over low heat and stir to loosen before using. Cooked chicken fingers can be refrigerated in a shallow container for up to three days, stacked with parchment between layers to prevent sticking. For longer storage freeze fully cooled chicken fingers on a baking sheet until solid, then transfer to a freezer bag for up to three months. When reheating frozen chicken, bake from frozen at 400 degrees F until hot and crisp and then toss quickly with warm glaze.
If you need dairy free options use plant based shredded cheese or omit cheese and add sliced avocado for creaminess. For a gluten free version choose gluten free breaded chicken fingers and gluten free large tortillas. To reduce sugar replace part of the brown sugar with a natural sweetener such as maple syrup using a ratio of three parts sugar to two parts syrup and reduce water by 1 tablespoon. For a milder heat use 1/4 cup hot sauce and add 2 tablespoons honey to preserve balance. To increase protein add black beans in the wrap or swap the tortilla for a high protein flatbread.
Serve these wraps with a crisp side such as coleslaw or a simple cucumber salad to cut through the richness. A side of kettle chips or baked sweet potato fries offers a casual crowd friendly option. Garnish with fresh cilantro or chopped scallions and offer lime wedges to squeeze for an extra bright note. For a party consider slicing the assembled wraps on the bias and securing them with a toothpick for finger food style presentation.
While this dish is a modern American comfort style assembly it borrows from classic flavor pairing ideas that originated in many kitchens. The combination of hot sauce and sugar mimics barbecue glaze techniques where spicy and sweet elements are balanced. Breaded chicken fingers are a convenience influenced by quick serve traditions, and wrapping the components into a tortilla follows a portable meal approach popular in many regions. What results is a hybrid that uses pantry staples to deliver high satisfaction with minimal fuss.
In summer swap the tomato for heirloom slices and add fresh corn kernels for sweetness. In winter use roasted pepper strips and a handful of arugula to bring peppery notes. For holiday gatherings elevate the glaze by stirring in a teaspoon of cranberry preserves and a pinch of smoked paprika for depth. The recipe scales well, so you can double the sauce and chicken when feeding a crowd or create a filling bar where guests build their own wraps.
Make the glaze up to five days ahead and store chilled. Reheat gently and toss with reheated chicken on the day you plan to serve. Keep tortillas wrapped in a clean kitchen towel after warming to retain pliability. Pack components separately for lunches, with sauce in a small leak proof container to be poured over chicken at mealtime. For busy weeks cook a double batch of chicken fingers and freeze in individual portions for quick assembly.
These sticky chicken finger wraps are a reminder that comfort food can be quick, flexible and delicious. Make the glaze your own and enjoy the smiles that follow when you serve a simple yet satisfying meal.
Warm the tortillas briefly in a hot dry skillet or microwave wrapped in a towel to make them more pliable for rolling.
If the glaze becomes too thick let it sit off heat for a few minutes, then rewarm gently to loosen before tossing with chicken.
Crisp cooked chicken in a 400 degree F oven for 5 to 7 minutes before glazing to keep the exterior from becoming soggy.
Pack the sauce separately for lunches to prevent the tortilla from getting soggy and assemble just before eating.
This nourishing sticky chicken finger wraps recipe is sure to be a staple in your kitchen. Enjoy every moist, high protein slice — it is perfect for breakfast or as a wholesome snack any time.
Yes, you can use frozen fully cooked chicken fingers. Reheat them until crisp before tossing in the glaze for best texture.
Store the sauce in the refrigerator for up to one week. Rewarm gently on low before using to restore pourable consistency.
Use gluten free breaded chicken fingers and gluten free tortillas. For dairy free option choose plant based shredded cheese or omit cheese.
This Sticky Chicken Finger Wraps recipe makes perfectly juicy, tender, and flavorful steak every time! Serve with potatoes and a side salad for an unforgettable dinner in under 30 minutes.
Combine hot sauce, brown sugar and water in a medium saucepan. Heat over medium and stir until sugar dissolves and sauce comes to a gentle boil, about 5 to 10 minutes. Remove from heat and let rest a few minutes to thicken, then set aside.
If using frozen chicken fingers, cook according to package directions and reheat in the oven until crisp. Transfer warm chicken to a large bowl for saucing.
Pour most of the warm glaze over the cooked chicken and use tongs to turn each piece so the sauce adheres evenly. Reserve a small amount of glaze for finishing.
Place two sauced chicken fingers on each tortilla, top with about 1/2 cup shredded cheddar, sliced tomato and chopped lettuce. Fold and roll tightly, and serve immediately.
Serve warm with extra glaze on the side and optional lime wedges or cilantro garnish. Eat immediately for best texture.
Last Step: Please leave a rating and comment letting us know how you liked this recipe! This helps our business to thrive and continue providing free, high-quality recipes for you.
Leave a comment & rating below or tag
@silksavor on social media!

Tender baked salmon crowned with a garlicky Parmesan herb crust, bright lemon, and buttery crunch. Simple to make, stunning to serve, and irresistibly flavorful.

Buttery graham crust, silky cheesecake, and cinnamon-kissed apples under a crunchy crumb, finished with glossy caramel. A fall crowd-pleaser you will crave.

Tender green beans in silky mushroom cream, crowned with crispy onions. A comforting holiday side made entirely from scratch that always disappears fast.
Leave a comment & rating below or tag @silksavor on social media!
Enjoyed this recipe? Share it with friends and family, and don't forget to leave a review!
This recipe looks amazing! Can't wait to try it.
Comments are stored locally in your browser. Server comments are displayed alongside your local comments.

Join to receive our email series which contains a round-up of some of our quick and easy family favorite recipes.
